Ballast wiring has gained popularity in gas discharge light source circuits. Ballast wiring can be tricky yet easy if you follow the right steps. But it might be common for a beginner to make mistakes. So, what happens if a ballast is wrongly wired?
If you wire a ballast wrong, the ballast will overheat, cause a short, burn out the tubes, and even start a fire. You can diagnose the problem if you experience buzzing noises, changing colors, or dimming and flickering lights. To fix it, you must rewire or replace the ballast.
This article will elaborate on the results of wrong ballast wiring, signs to identify the problem, and steps to fix the wrongly wired ballast to prevent overheating and fire hazards.

Check out our list of top-handpicked products for all your electrical, appliance, and HVAC system needs to keep your home running smoothly.
This post includes some affiliate links.Overview of ballast wiring and its importance
Ballast wiring has become essential for gas discharge light source circuits.
Ballast is an additional device in these circuits.
The gas discharge lamps are made with arc discharge features and have negative resistance characteristics.
In these features, the voltage keeps reducing with the increasing current.
So, it is difficult to create a stable operating area.
A ballast is installed and wired in the gas light source circuits to stabilize the discharge and control the electricity in the lamps.
In simple words, a ballast regulates the electricity to the lamp lights and gives enough voltage to turn them on.
Without a ballast, there will be no current limit, and the light will connect directly to a high-voltage power source, increasing the current draw.
Multiple types of ballasts are available, like magnetic ballasts, electrical ballasts, hybrid ballasts, capacitive ballasts, LC ballasts, and resistance ballasts.
The magnetic and hybrid ballasts have a copper coil wound as the main element over the magnetic core.
The electrical ballasts use solid-state electronic circuits to operate the electrical situations in the lamps.
A fixture may look like it has two tubes powered by one ballast, but there are two ballasts in one body.
The wires from one ballast connect to the fixture’s one side, and the wires from the other ballast will connect to the other side of the fixture.
Common mistakes made during ballast wiring
While wiring a ballast, house owners make some mistakes while trying something new, especially if the individual is a beginner:
- Some people try connecting ballasts to 120V on the 277V tapping. It will result in lower OCV than the lamp requires. As a result, it won’t start, underpower the lamp, and even fry the ballast.
- If you use a 480v H-33 encapsulated ballast and mistake using it in 120V, it will trip the breaker within a few seconds.
- Some people try connecting a 120V to 240V primary tap on a 1000W MH ballast. It will work fine if you apply it between 120V and 240V tap. But the winding section will be wound with a thin wire, therefore overheating the ballast.
You should avoid such mistakes and ensure you are wiring it correctly. If you lack confidence, call a professional to help you out.
Consequences of improper ballast wiring
The wires should remain in their correct positions while wiring a ballast.
A ballast contains 5 wires – black, white, blue, blue equivalent, and red.
A ballast is connected to the home’s hot, neutral, and ground wires on one end and the light fixture’s lamp holders on the other.
The yellow wires in the ballasts are one-half power circuit sources.
You may have yellow on one end and blue or red on the other.
The gray/red wires are the return path for the second lamp sets.
In simple words, this wire is the neutral wire for the lamps.

If these wire connections go wrong, the results can be dangerous. Some serious consequences involve:
- Short circuits
- Overheating
- Fire hazards
- Electric shocks
- Burnout and smoke
- Melted ballast windings
- Current flow disruption
Using the wrong ballast will also have bad consequences. A wrong-sized ballast will not let the light turn on.
Besides, there will be possibilities of burnouts due to overcurrent and overvoltage.
The condition magnifies if you use a large ballast in a smaller light fixture.
Lights not turning on, burnt tubes, and brown and black ends are some common indicators of bad ballast or wrong wiring in the ballast.
The next section will highlight all the signs.
How to diagnose and fix a wrongly wired ballast?

As mentioned, wrongly wired ballast can result in serious issues like overheating, burnout, and fire.
So, how do you diagnose and solve the problem before something dangerous occurs?
Warning signs
Here are some common signs of a bad ballast or wrongly wired ballast:
Flickering
Some house owners mistake a flickering or strobing light as a problem related to the bulb, tube, or burnout.
If your light flickers, it signals you have either a wrong ballast or wired it incorrectly.
Buzzing sound
Bad ballasts or incorrect wiring in it will often create a buzzing and humming noise, especially when they are on their way out.
If you hear such noises from your lights, consider testing the ballast.
Delayed start
If you have bad or wrong-wired ballasts, your light will start behaving like HID whenever you turn it on.
It will also take time to reach the proper brightness level.
Consider checking your ballast once.
Low output
Your light will give you output lower than expected, which means you will receive a dim or low-lumen outcome.
When this happens, there are a few things to blame for:
- Old fluorescent lamp
- Aged ballast
- Wrong size or incorrectly wired ballast
Check the condition of both the light and the ballast.
Inconsistent light levels
Color variation and fading are common in fluorescent lamps.
At different times in the lamp’s life, it will produce different light levels.
If you notice dark corners and inconsistency in the light levels, the problem will be either in the lamp or in the ballast.
Other signs
Other signs indicating an improper size or wiring are:
- Swollen casing
- Burn marks
- Leakage
- Water damage
How to fix a wrongly wired ballast?
A wrongly wired ballast will cause a short, burn the tubes, and start a fire.
If you have wrongly wired it, you need to rewire or replace it.
Here are the steps to rewire a ballast:
1. Unplug the light fixture

You need to unplug the fixture first.
If you have a hard-wired fixture, turn off the circuit breaker powering the light.
Climb the ladder to remove the light cover and the light bulb by turning and sliding it out of the fixture.
Set the fixture aside.
2. Remove the fixture’s reflector
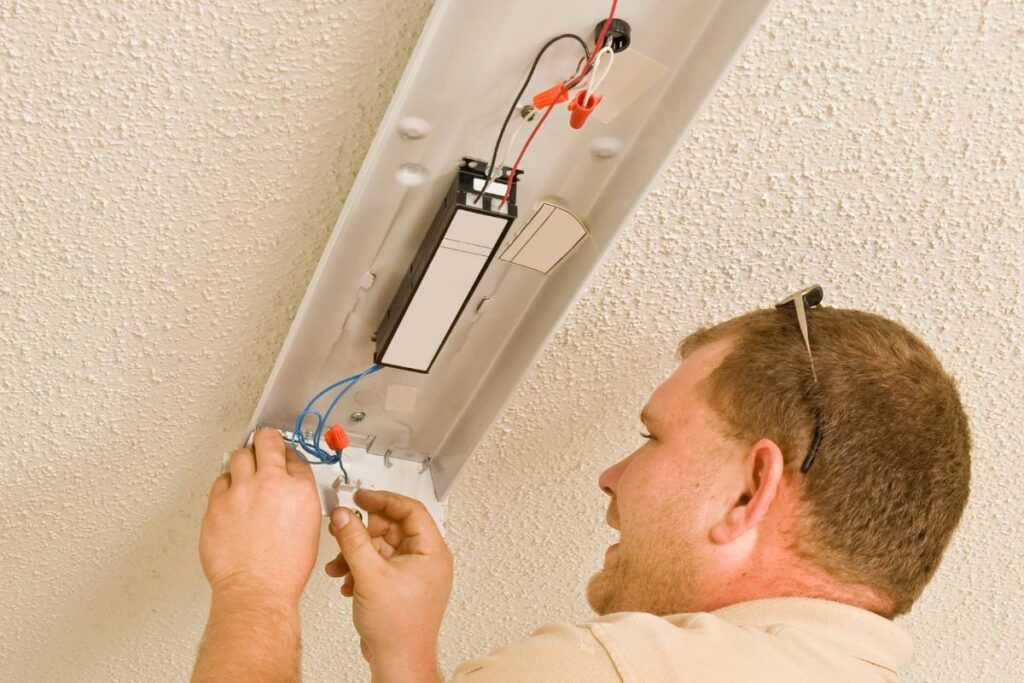
Remove the reflector of the light fixture and expose the ballast and the wiring.
The reflector will be a metal inner cover behind the fluorescent tube.
The small screws will hold it, or it will have tabs to snap in the slots of the fixture housing.
Unscrew it with a screwdriver or use your fingers to press the tabs and remove the reflector.
3. Test and disconnect the wires
Test the exposed wires with a voltage tester.
Touch one end of the exposed wires to the tip of the tester and see if they are live.
If you do not find any power, disconnect the hot and neutral wires by unscrewing the nut and pulling them apart.
Remove the blue, yellow, and red wires in the same way.
If the ballast has a green ground wire, remove the screw and detach it from the fixture housing.
4. Removes the ballast
If you have the wrong ballast type or size, you need to remove and replace it.
To remove the ballast, unscrew the screws holding the ballast to the fixture housing.
The ballast will be the black rectangular box screwed to the light fixture housing.
5. Install the new ballast and rewire it
Put the new ballast in place and reassemble everything in the reverse position.
Strip the ends of the new ballast’s wires with a wire stripper.
Now, connect the colored wires of the fixture and the ballast properly with the wire nuts:
- Blue to blue
- Yellow to yellow
- Red to red
- Black to black
- White to white
Wire correctly. Otherwise, you will again face the same issues.
If your ballast contains a ground wire, connect it to the fixture with a screw.
Install the reflector and light, cover them, and turn on the circuit breaker.
Turn on the light to check if it is working.
Safety precautions and best practices for ballast wiring

Wiring a ballast is tricky, but you can succeed if you follow the correct steps in the right sequence.
Before hooking them with the new ballast, you should test all the light components.
Here are some safety precautions and best practices to consider while wiring a ballast:
- Before fixing a ballast or ballast wiring, ensure the problem is with it and its wiring. Ballasts can be quite expensive.
- Keep the power off before working with the ballast. Use a multimeter or voltage tester to confirm the ballast has no power.
- Ballasts can get very hot. So, wait for some time after you have turned off the power.
- While replacing a ballast, ensure the product matches the voltage, wattage, and brand. Carry an old ballast to the store or note down the facts about the old one to show it to the staff.
- While wiring, see how the old ballast is wired and take a picture. It will let you wire the ballast correctly after replacement.
- The ballast wires are small. So, the wire crimps and nuts should be suitable for small wiring.
- Leave enough wire to stick out from each ballast end. It will prevent you from cutting the wires short and help you re-cut and rewire if you ever wire it wrong.
- Install the ballast inside the mounting bracket first and then connect the wires, so the heavy ballast doesn’t hang down or become loose.
- The same applies to multiple ballasts. After mounting them, wire them one by one.
- Wire splices are safer than wire nuts. If you don’t know about the crimping tool, rehearse on old wiring pieces to gather information.
- While working, wear protective gear and glasses, keep yourself dry, and avoid keeping any wet or metal things near you.
- Keep a fire extinguisher near you for emergencies.
Final thoughts
Wiring a ballast is easy if you follow the right steps.
Make sure to use the right ballast size and wire it correctly. Otherwise, a wrongly wired ballast can cause dangerous issues like overheating, burnouts, and fire hazards.
When you wire a ballast wrong, it shows some obvious signs like black ends in the light, humming or buzzing noises, delayed start, low output, and flickering.
When you see these signs, check the ballast once and fix it soon. Follow the safety precautions while wiring a ballast to complete the work safely.
How do I identify whether a ballast is T8 or T12?
You can identify it by the tube diameter if there is no marking. T18 ballasts are 1 inch, and T12 are 1½ inches.
How long does a ballast last?
According to the Certified Ballasts Manufacturers Association, a ballast should last 12 to 15 years if you have the right size and are wired correctly. However, cold environments and bad bulbs can reduce their lifespan.
Do I need to ground a ballast?
A ballast does not need to be grounded.
Reference: Electrical Wiring Wikipedia, Home wiring Wikipedia.
