When a doorbell stops working due to a defective transformer, you must replace it. Finding out the doorbell transformer can be challenging. But, no matter the location, the replacement steps are more or less the same for all locations.
If your doorbell transformer is attached to the electrical panel, open the panel cover, turn off the main circuit powering the transformer, Check the transformer wiring, disconnect the old transformer, and install the new one with the same wiring setup. Turn on the power to check the bell.
It is just a brief of the replacement procedure. For detailed information, read this article till the end. We shall discuss the steps in detail, along with some good doorbell transformers to attach to the electrical panel.

Check out our list of top-handpicked products for all your electrical, appliance, and HVAC system needs to keep your home running smoothly.
This post includes some affiliate links.What is a doorbell transformer?
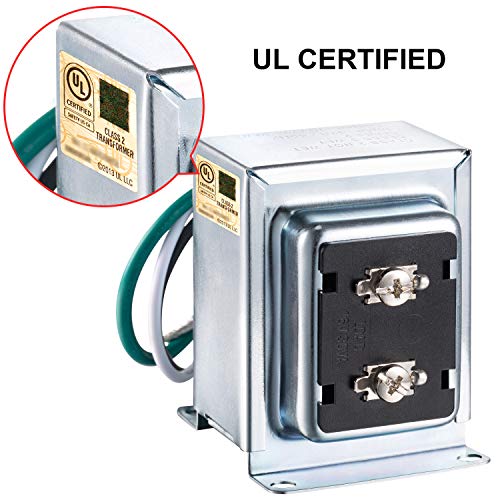
The doorbell transformer is an electrical device responsible for stepping down the house’s current from 120V to 10-24V, which the doorbells need.
The transformer comes in a brass or silver-colored box, measuring about 2 to 3 inches square. It contains 2 to 3 terminal screws on the face.
You can install it anywhere in your house. The most common place to install the transformer is on a junction box or a wall near the electrical panel.
If the doorbell stops working for some defects, you must replace the transformer.
Once you have located the transformer, you only need to follow the correct steps to replace the transformer.
Should a doorbell transformer be in an electrical box?
A doorbell transformer has to be in an electrical box, also called a junction box.
The doorbell transformers are attached to a knockout hole in the electrical box.
The main wires of the transformer travel into the hole and connect to the 120V in the box.
Some doorbell transformers are installed inside the electrical box, and the Romex is connected inside that box.
What are the common locations for doorbell transformers?
Though most transformers are located inside the doorbell’s chimes or enclosure, there are other places too:
- The first common location is by attaching it to the electrical panel. A metal junction box will be mounted to the panel box or on the wall near the panel.
- The next place is the garage due to the easy access. Experts surface to mount the transformer to avoid overheating.
- The next location would be near the security system, the system keypad, or the control station.
- Lastly, check the furnace closet, attic, basement, or beneath staircase.
In this article, we shall discuss the replacement steps of the doorbell transformer attached to the electrical panel.
How to replace the doorbell transformer?

Replacing a faulty doorbell transformer is very easy once you have located it.
Tools needed:
- New doorbell transformer
- Screwdriver
- Wire stripper
- Electrical tape
- Multimeter
- Wire nut
- Flashlight
- Non-contact voltage tester
Below are the steps to replace a doorbell transformer attached to the electrical panel:
Step 1: Turn off the main breaker.
Find the main circuit box of your house that controls all the lights and other devices.
Turning off the main breaker will ensure that there is no power supply in the electrical system and assure that you won’t receive any electrical shocks while working.
Step 2: Find the Transformer.
Expect the transformer to be in the junction box or attached to the electrical panel.
If you already know that your transformer is attached to the electrical panel, replacement steps are easy.
Open the electrical panel to find the transformer.
You will also see some drywall added after the transformer is installed.
Step 3: Test for power
Before disconnecting the transformer, you should test it for power.
It will ensure that you have successfully turned off the power and there is no risk in working with it.
Touch the non-contact voltage tester to each low-voltage screw terminal on the transformer’s front.
Test the circuit cable for voltage leading to the transformer’s junction box if you can access it.
If any of these cables or screw terminals show a voltage reading, return to the main service panel, turn off the correct breaker, and retest it again.
Step 4: Access the transformer and disconnect it.
Suppose your transformer is attached to the electrical panel.
In that case, you should remove some part of the wall to access the transformer for disconnection.
Also, frame a small access panel. It will let you get to the new transformer after installation.
Turn off the breaker, loosen the screws, and remove the wires connecting the transformer to the doorbell and electricity.
Keep the screws aside and safe, and then pull the transformer out of the box.
Step 5: Install the new transformer.
Before installing the new transformer, ensure you have bought a model that matches the old one.
An incompatible transformer won’t let your doorbell work properly.
So, you will have to spend extra money if the device does not meet your doorbell’s needs.
The doorbell transformer will have 3 wires – 1 black or hot wire, 1 white or neutral wire, and 1 bare green or ground wire.
Mount the new transformer inside the panel or the junction box and complete the wire connections in the same way they were connected before.
You can take a picture before dismounting and disconnecting the wires. It will let you reassemble everything in place after the replacement.
Step 6: Complete the wire connections.
Connect the black wire from the doorbell’s transformer to the black wire from the power supply.
Repeat the same for the white and bare wires.
Cover the wire connections with wire nuts.
Connect the 2 wires from the doorbell chime, push the button to the 2 screw terminals at the transformer’s bottom, and complete the connection.
Step 7: Turn on the power supply and test the transformer.
Once you have completed the connections and the installation, cover the junction box and the electrical panel.
Turn on the main breaker that supplies power to the doorbell and check if the transformer is working.
If it works fine, you have done everything correctly. If it doesn’t, call an electrician to do the job for you.
How much will it cost to replace the doorbell transformer?
A new doorbell transformer will cost around $13 to $24 today.
The cost of hiring an electrician to fix the transformer will be around $150 to $300, based on your location.
So, if you replace the doorbell transformer yourself, you only need to spend $13 to $24 to buy the transformer.
You can save the labor cost, around $200 to $300.
However, if you feel hesitant about doing the work yourself, you are free to call an electrician.
It might be costly, but it is better to spend the money and spend it on expensive damages in the future.
Some best doorbell transformers to attach to the electrical panels
If you have a doorbell transformer attached to the electrical panel, you would have to replace it when it becomes defective.
Sometimes, beginners need help with getting the right transformer.
So, here are 5 best doorbell transformers that you can use as a replacement:
Maxdot
24V 40VA Thermostat and Doorbell Transformer, Power Supply Compatible with Nest, Ecobee, Sensi, and Honeywell Thermostat, Nest Hello Doorbell, and All Versions of Ring Doorbell (Style 1) will make an outstanding transformer with good quality materials.
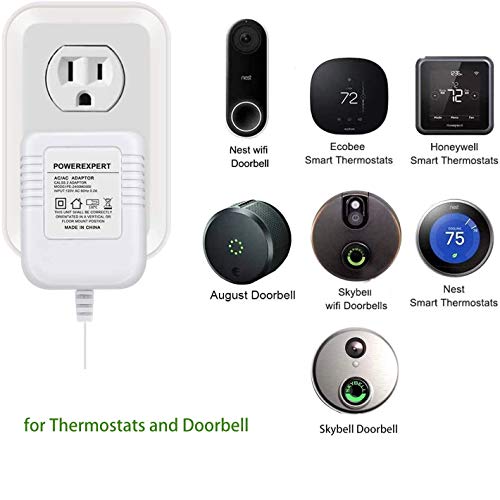
It works as the label explains and best fits Nest, Ecobee, Honeywell, and Sensi smart thermostats.
The transformer works well with the Unifi protect G4 doorbells but is incompatible with ring doorbell pro 2 video doorbells.
The transformer produces only 1.66 amps. A 20 amp breaker would be ideal for it.
The transformer is also UL-certified and offers good performance.
Maxdot old transformer
The best part about using the Maxdot old transformer (Doorbell Transformer Compatible with Ring Video Doorbell Pro 16v 30va Hardwired Door Chime Transformer) is its price.
It is cheap and available to ship within 24 hours after order.
The transformer has an output voltage containing 16V 30va.
The transformer is compatible with Ring video doorbell pro and Nest Hello video doorbell. It can power Ring, Ring Pro, and Ring video 2.
The transformer is old school, not strong enough to support the camera, and the video has to be 24V.
The transformer is installed separately from the chime, so you can replace it without affecting it.
Ragnaros
Ragnaros Doorbell Transformer, 16V, 30VA Compatible with Ring Pro, Nest Hello transformer is good for old houses with mechanical doorbells.
If you hear a buzzing sound from your ring doorbell, it indicates that the transformer requires more power.
This transformer will be the best replacement in such a case.
Ragnaros is best for replacing a 16V and a 10Va transformer for driving the under-powered ring pro.
The Ragnaros transformer is straightforward and works as expected.
It is a tennis ball size with wires running.
The transformer works with numerous types of doorbell cameras.
It is a 30-watt and 16-vac transformer compatible with the Ring video doorbell pro and Nest Hello video doorbell pro.
The transformer is a perfect upgrade for the underpowered old transformer.
Viivria
Viivria (24 Volt Transformer, C Wire Adapter Thermostat, Compatible with All Versions of Ring Doorbell and Thermostat for Nest Ecobee, Sensi, and Honeywell, 315″ Long Cable 24V Transformer) is a simple type of 24V transformer that meets maximum customers’ needs.
The Viivria attached the doorbell to the electrical panel is easy to control.
The cable is 8mm long, which makes you stress-free about the distance between the socket and the smart wi-fi thermostat.
The transformer works great for Honeywell and Emerson Sensi smart thermostats.
The transformer also provides low voltage alternating current power and not direct current power.
Its 315-inch long cable makes wiring easier.
Transformer for ring-wired video doorbells
Hardwired Transformers for Ring Wired Video Doorbells come in various styles, thus making it easier to select a suitable one for your doorbells’ preferences.
Make sure the transformer fits after entering the model number.
The transformer can solve maximum issues related to voltage, and it also contains a dedicated circuit breaker.
The transformer is a perfect fit for replacement purposes and is quite reliable.
You can use it for the replacement of North American doorbell transformers.
Final thoughts
Once you locate your doorbell transformer, replacement is easy. If your doorbell transformer is attached to the electrical panel, uncover the panel, turn off the breaker, and test it for voltage. If there is no power, unscrew the screws and nuts to remove the old transformer, replace it with the new one, connect the wirings, and cover the panel.
The transformer might be in a junction box attached to the electrical panel or a wall. It would be best to take the junction box out to replace the transformer. Remove some parts of the wall to access the transformer if there is drywall.
Some good doorbell transformers to attach to the electrical panel are Maxdot, Ragnaros, and Viivria. Though the article highlights the replacement of the doorbell transformer attached to the electrical panel, numerous people struggle to find the transformer, for which I shared a list of common locations.
What makes a doorbell stop working?
Issues with the wiring, transformer, chime box, and button are some of the primary reasons behind a faulty doorbell.
How long does a doorbell last?
Doorbells can last for about 10 to 15 years. But their lifespan can be reduced since they get exposed to several outdoor units.
Reference: Doorbell Wikipedia, Smart doorbell Wikipedia.


