If you have got a new washing machine for your home, you must vent the machine’s drain pipe. It will prevent leakage and flooding of your basement or laundry. You can either call a professional to fix the vent or do it yourself.
To vent the drain pipe, bend the top of the drain hose in a U-shape and hook it to the drain hole. The main venting pipe has to be connected to the drain hole. Install an air admittance valve on the drainage pipe to control the air pressure in your system.
This article will help you with a detailed procedure for venting the washing machine drain pipe and other factors to consider, the importance of venting, the cost of venting, etc.

Check out our list of top-handpicked products for all your electrical, appliance, and HVAC system needs to keep your home running smoothly.
This post includes some affiliate links.Is a vent for the washing machine drain pipe necessary?
Venting the washing machine drain pipe allows the air to enter the pipe when the water drains out.
It prevents the vacuum and makes sure that the water can drain completely.
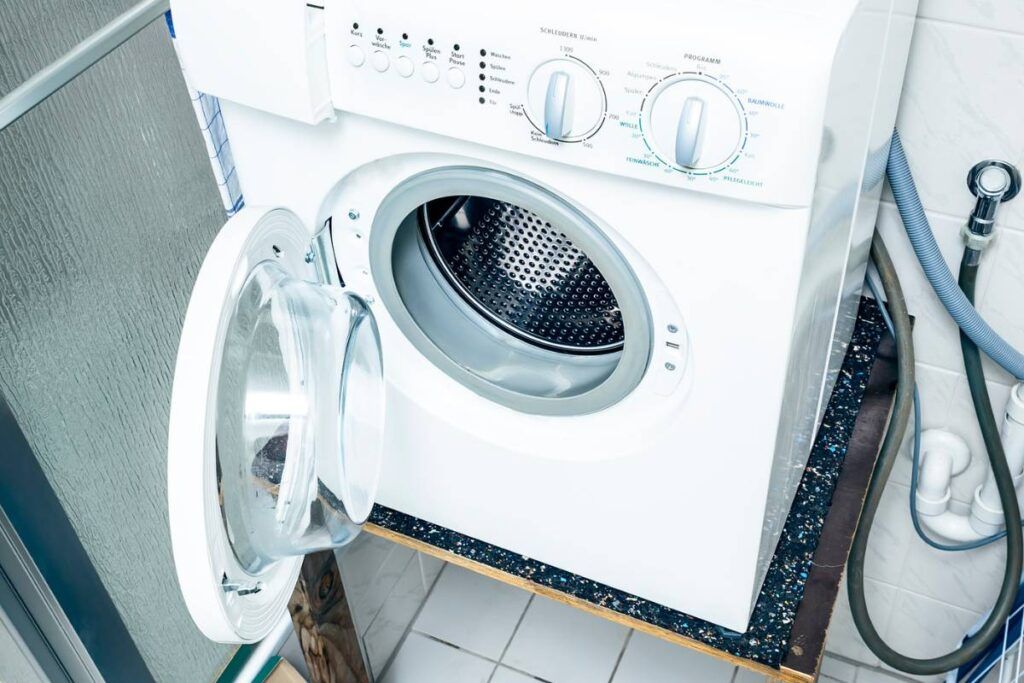
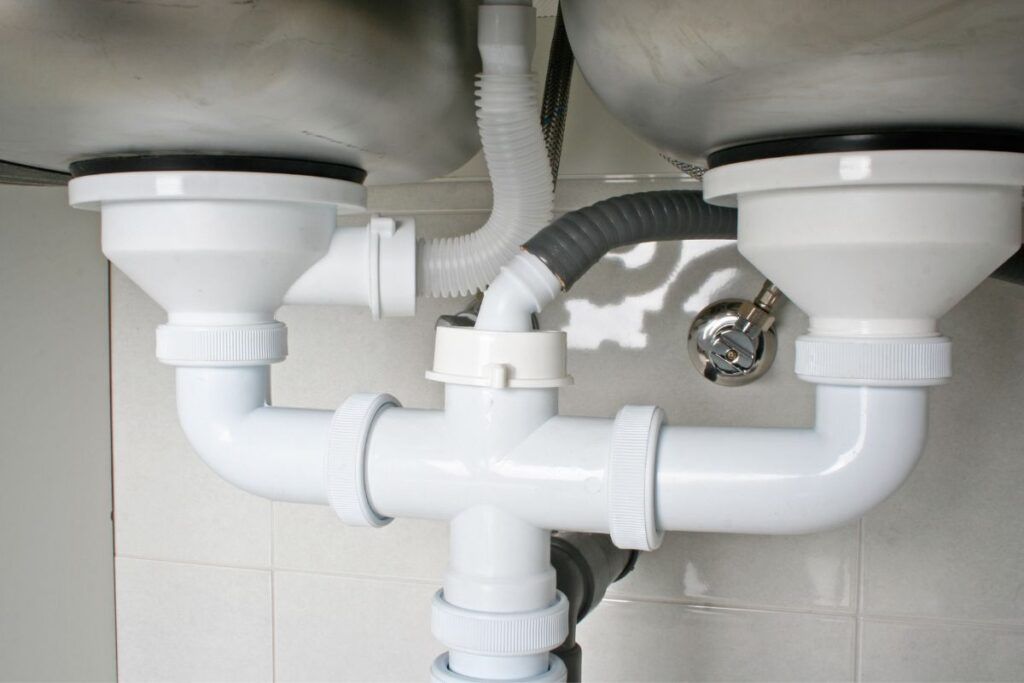
If you notice carefully, you will find that the ending side of the washing machine drain hose is connected to a Tee fitting.
This T fitting is further attached to two different drain hoses with different lengths.
If you do not vent the drain pipe, the water will not drain properly and will start coming back to your washing machine.
It can further cause other issues like leakages and floods.
You will also face issues with the washer.
So, you must vent your drain pipe properly to release the water and prevent floods.
Things to consider while venting a washing machine drain
When you think of venting a washing machine drain pipe, you should consider a few factors:
- Ensure that the drain pipe is correctly installed in the washing machine. It will ensure that the pipe remains tight and does not cause any problems or damage.
- Use a good venting system that is compatible with your washing machine.
- Always use a sponge or clean cloth to clean the inside of the pipe after every use. It will reduce the formation of dirt and filth, which can further block the pipe.
- Avoid harsh chemicals in the drain. That can damage the pipe.
- Check the vent regularly for blockages. It will prevent leaks, floods, and damage to the machine.
- Avoid overuse of detergent.
How to vent a washing machine drain pipe?
Things needed:
- A valve for air admittance or AAV – The valve controls the air pressure when you drain the bad water. You can install it above the P-trap, which traps water and blocks the sewer gas.
- Inlet valve for water – The water inlet valve helps hold the hot and cold water until they are released after you turn on the machine.
- One-way valve or Solenoid valve – It helps open the obstacle, transfers power, and supports the water entry valve. Once you turn it on, you can regulate the water temperature by alternating between the cold and hot settings on the machine.
- Pump hoses – Blue and red hoses in the water entry valve are for cold and hot temperatures. Use valve hoses in the same color to connect the valve on the washing machine’s rear. You can also use these hoses as a water conduit while washing.
- Disposal house – It is a drain pipe. You can change it by using a longer drain pipe if needed.
- Slack locks – These locks maintain the stability of the drain hoses, wires, and valve hoses which sometimes get separated due to the machine’s vibration.
- Dryer cord – The dryer cord helps connect the four wires – red, green, black, and white – to the primary power source. These wires control the timer, sensor, and other features. The cord divides the voltages to lower the level. Washing machines use lots of electricity, and lowering the level can prevent electric shock and fire.
- Breathing hose – It is for adequate air so that the pipes stay dry and send the vapor out of the outlet.
- Standpipe – It is a horizontal pipe from the drain to the washer. It is angled at ¼ inch per foot toward the drain.
- Vent pipe – It is a straight pipe that helps to vent the sewer gasses. It is vented through the roof.
- P-trap – It ensures that the water does not remain stagnant and creates a seal to sew the gasses to prevent them from entering the room.
Step 1
Your first job will be to diagnose the problem due to the absence of the washing machine’s drain pipe vent.
If you start working without looking out for the issue, you will be tearing out the drywall to find out that you already have a drain vent installed in the wall.
Check the attic or roofline and see if any PVC pipe has been installed.
It works as the laundry room’s vent.
So, you can easily find the current drain vent unless you have an air admittance valve or AAV in the wall.
Check for blockages too.
Step 2
Disconnect the washing machine and the dryer.
Since you have to tear the drywall, you must clear the surrounding area for work.
If you are working around the dryer outlet, flip the breaker and turn it off.
You should keep water and electricity away from each other.
Step 3
Once you have removed the drywall, consider thinking about what exactly you should do.
If you already have an air admittance valve and your washing machine is still not working properly, check for the AAV’s proper functionality.
These valves can give out 20,000 cycles every 20 years.
Step 4

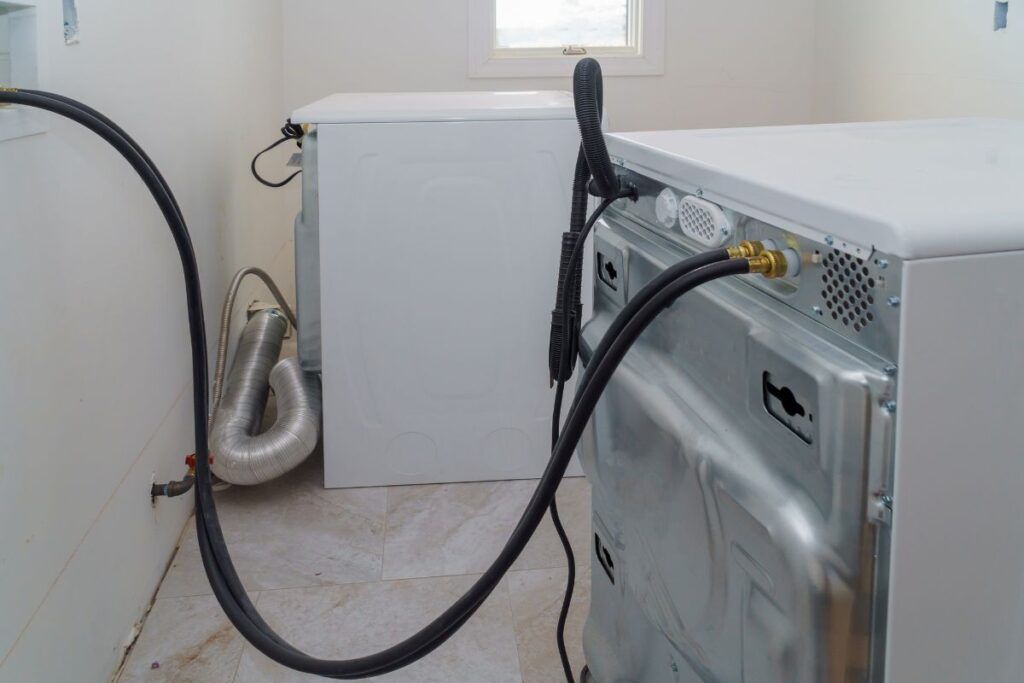
Find the water inlet valve and use the red and blue cords to connect them to the back of the washing machine.
Fasten the filter to the end of the drain hose with the help of waterproof adhesive tape.
The washing machine will have a drain hose by default.
Step 5
Bend the hose’s tip to a U-shape before connecting it to the drain hole next to the water inflow valve.
Now, connect the primary ventilation pipe to the drain hole.
Step 6
Install an AAV on the drainage pipe if there is no drain vent.
The AAV has to be at least 4 inches above the washing machine drain connection or the P-trap level.
The AAV will help regulate the air pressure while draining.
Step 7
Once you have fixed everything, test the machine with water.
Turn it on with a full cycle and let the water fill and drain.
Once you have confirmed the operation, remove the machine and cover the hole in the wall.
You can also install a wall vent near the AAV so that the room’s air can get pulled out of the system.
Step 8
Re-connect the wires and plug back the washer and the dryer.
How to vent the dryer alone?

If the dryer of your machine is separate from it, you will have to vent the dryer alone.
Here are the steps:
- Turn off your dryer for safety purposes.
- Find the vent hole located along the lower back portion of the dryer.
- Install the ventilation hose that connects the dryer to the main vent.
- Install a 4-wire dryer cord by connecting the cables accordingly with the colors.
- Use a wet fabric to test whether the dryer works and drain it.
The Do’s and Don’ts while venting a washing machine drain pipe
While venting a washing machine drain pipe, you must follow some guidelines and avoid doing certain things.
Here is a list of the do’s and don’ts while venting the washing machine drain pipe.
Do’s
- Clean the filter screen of the washing machine to avoid clogging and blockage. The screen is where the drainage hose is attached.
- Keep the washing machine on a plank about 3 inches above the ground to avoid electric shocks when the floor is wet.
- Check for the pipes for damages before doing any laundry work.
- Cover the valves with a box or a frame to avoid children from detaching the hoses.
Don’ts
- Do not drain the water if the vent is in bad condition.
- Do not use any incompatible pipes. Narrower pipes will cause hydraulic pressure, whereas wider pipes will start flooding. Use a pipe measuring only 3-6 inches wide.
- Do not approach the work without any professional guidance. Otherwise, you will face issues whose solutions could be unknown and expensive.
Does the washing machine drain hose need air?

If the drain hose of your washing machine is continuously draining water, the reason could be some blockage in the hose.
If you find any such thing in your washing machine, you must have a vent to let in air for circulation.
There are a few tips for doing it:
- Remove the drain hose from your washing machine and keep it in a sink or bucket.
- Use a plunger to penetrate air forcefully through the hose and the washing machine.
- Now separate the drain hose from the machine and blow it into it. It will push air through the hose and the machine.
- Pour water into the washing machine and disconnect the drain hose quickly.
- The water running in the hose will push the air through the hose.
What is the code for the washing machine drain?
Before you fix the drainage system of your washing machine, you must know the code for the washing machine drain pipes.
The code tells you how the washing machine will ventilate the water used during the cycle.
When you think of fixing the machine’s drain pipe, there are certain standard codes that you need to use for every work.
The codes also include the drain pipe of your washing machine.
The drain pipe for a washing machine has to be around 2 inches in diameter.
It is the standard size for most drains, so it will be easy to find the pipe for replacement.
During the installation, install the drain pipe for your washing machine so that it slopes downward at the rate of ¼ inch per foot.
It will ensure that the water drains properly out of the pipe and gets into the sewer or septic system.
You must also install the drain pipe with a P-trap so the water coming back can be caught in the trap instead of overflowing.
How can you prevent overflow of the washing machine?
There are other ways to prevent water from overflowing from your washing machine and keep the pipe free of debris or lint.
However, venting is mandatory.
Here are a few ways to prevent overflowing:
- You can use a garment or a lint bag to prevent the excess buildup of lint inside the drain pipes.
- Maintain ½ inch distance between the drain pipe and the discharge hose for adequate drainage.
- Use good detergents to avoid the buildup of soap remains.
- Clean the hoses and drain pipe regularly.
How to clean a washing machine drain pipe?

Some people are unfamiliar with the right guide to clearing a washing machine drain pipe.
Clearing the drain pipes often will prevent flooding and leakages.
You can follow the following methods to clear your machine’s drain pipe. The steps are simple and easy to perform.
Method 1
- Unplug the washer from the power outlet and turn off the water supplies.
- Check whether the water tub is empty or not. If water is left, empty it and get a bucket to avoid flooding the area.
- Locate the drain pipe from the machine. It will be attached to the back of the washer.
- You will find screws or a cap to unscrew and open the pipe.
- Take a plunger to clean the clogs. You can also use other drain-clearing tools to clean the pipe.
- Put the cap back and pour water to confirm the pipe is clear.
- Turn the washer on and run clean, warm water and a readymade cleaning product like baking soda or white vinegar. It will clean the pipe more.
Method 2
You will lift the washer to clear the drain pipe in this method.
Unplug the washer.
- Tilt the washer back to access the bottom of the front panel. You can take someone’s help too.
- When the panel is off, find the two hoses near the bottom of the washer.
- You will find the hoses connected to the drainage pump. You need to remove them before you continue working further.
- Once you have removed the hoses, you will see bolts holding the washer. Remove the bolt and lift the washer.
- Once the drain pipe is visible, check if there is any dirt, lint, or debris blocking the pipe. Use a brush or vacuum cleaner to remove the dirt.
- Once you have cleared everything, put the washer, the hoses, and the bolts back in their positions.
How much will it cost for the drain pipes?
The cost of the drain pipe depends on your requirements.
If you want to install or replace the drain pipes, it will cost around $230 to $1,140.
The building permit will cost around $30 to $150.
If you want to replace the whole washing machine, it will cost around $350 to $1,200, based on the size you need.
When should I call a professional?
If you hear noises from your washing machine, smell a bad odor, or see water coming out, you need to contact a professional plumber.
Taking care of problems immediately will save money and stop the problem from worsening.
The washing machine will need extra plumbing and cleaning of the drain lines.
Fixing such things is quite average or confusing for house owners.
So, calling a professional to fix these things is safe.
Final thoughts
It would be great to vent a washing machine drain pipe, as it will prevent leakages and flooding.
To vent the washing machine drain pipe, bend the tip of the drain hose in a U-shape, and hook it to the drain hole beside the water inlet valve.
The main ventilating pipe must remain connected to the drain hole.
You can install an air admittance valve or AAV on the drainage pipe to control the air pressure in the system.
Once you have done everything, test the machine’s drainage by pouring water and then turning on the machine.
Clean the pipes regularly to avoid further clogging and overflow of the water.
Related Articles
- Moving Washer And Dryer To the Other Side Of Wall: A Step-by-Step Guide
- 6 Reasons Your Washing Machine Is Off Balance (+Fix)
FAQs
What should be the length of the washer drain pipe?
If you use a 4-foot pipe, you can use it for 4 feet in length.
If you want to vent a pipe 2 inches in diameter, make sure that the pipe is 4 inches long.
If you want to vent a larger pipe, like a 10 to 12-gallon tank, vent the entire pipe.
How high should a vent be?
The vent for your washer should be around 24 to 40 inches higher.
It will make sure that the air pressure is under control.
Besides, the pressure of the evaporation of the bad water is required to empty and unclog the pipes.
How long does a vent last?
If the installation processes are followed properly, the vent can last around 12 years.
You cannot stop the drain damage because you will use them frequently. But, you can increase the lifespan with sufficient care.
Reference: GE washer front load user manual, LG Official Guide, Kenmore User manual, Maytag Front Load Washing Machine Official Troubleshooting Guide.

