Recent Posts

How To Pair A New Remote With Firestick?

An Amazon Fire Stick can turn your regular LED TV into a smart TV. But it won’t be smart if you do not pair the Fire Stick remote. The remote should automatically pair with your Fire TV Stick while setting up. But sometimes, it needs manual pairing. 

To pair a new remote with your Fire TV Stick, bring the remote close to the Fire Stick, press and hold the Home button for a few seconds until a light at the remote starts blinking. You will see some on-screen message or blue light on the remote flashing 3 times, indicating that it has been paired. 

It is the standard way to pair your new remote with your Fire Stick. There are other options to pair, but the situations are different, for example, pairing a secondary remote or losing the first one. This guide is all you need to learn about pairing a new remote to your Fire Stick. So, stick to the end. 

Types of Fire Stick Remotes

Though most televisions have become smart, adding a Fire Stick to a non-Fire TV can heighten your viewing experience. 

A Fire Stick is a Wi-Fi-enabled device connected to your TV’s HDMI port that allows you to stream content from your favorite subscribed channels. 

When you buy the Fire Stick, it comes with a remote so that after plugging in the Stick, you can control your Smart TV with this remote after pairing. 

There are several types of Fire Stick remotes. 

I have come across 5 different types of Fire Stick remotes:

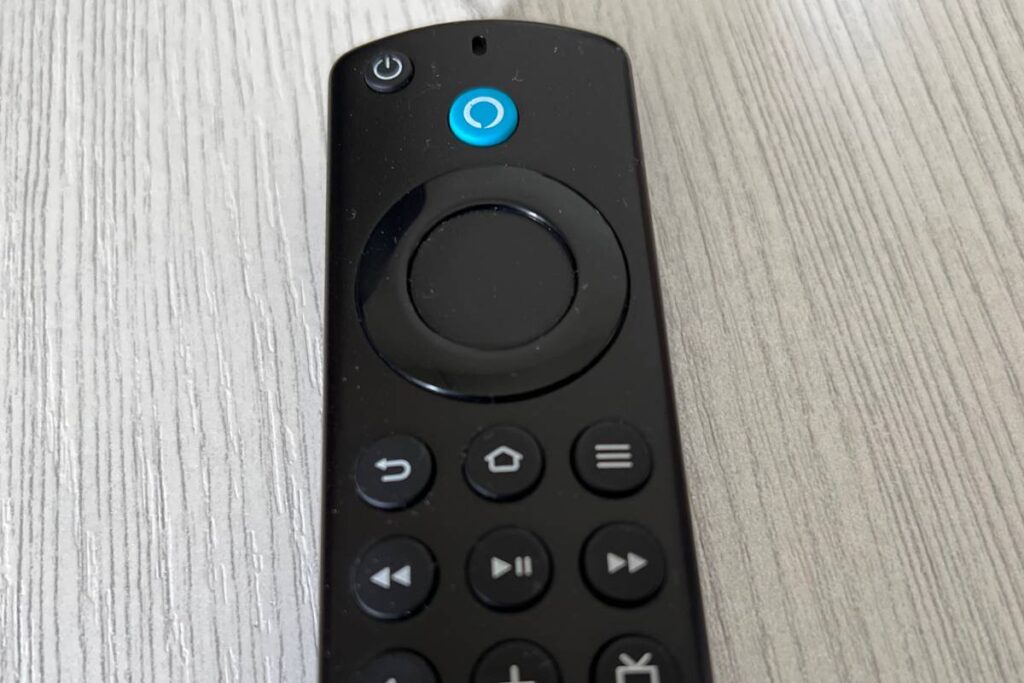
  • Amazon Fire TV Remote (with Fire TV Stick Basic and 1st Gen)
  • Alexa Voice Remote 1st Gen (with Amazon Fire TV 1st Gen)
  • Alexa Voice Remote 2nd Gen (with Amazon Fire TV 2nd and 3rd Gen, Fire TV Stick with Alexa Voice Remote, and Fire TV Stick with Voice Remote) 
  • Voice Remote with Amazon Alexa (with Amazon Fire TV Edition TVs)
  • Amazon Fire TV Remote App (available for Fire devices, iOS, and Android devices)

If you do not have these Fire Stick remotes, you can also opt for some third-party remotes supporting Fire Stick. 

Unboxing and Preparation

I have been using a Fire Stick for a while. 

I love the ease of using this, as I can enjoy my favorite videos and shows on the subscribed channels.

Let me share with you about the setup of the Fire Stick and the remote.

When you buy a Fire Stick, you receive the Stick, a remote, an AC adapter, a USB cable, and an HDMI extender. 

One end of the USB will be connected to the stick, and the other to the USB at the back of your TV. 

If your TV doesn’t have a USB at your TV’s back, you connect this end to the AC power adapter and connect the adapter to the wall outlet. 

The Stick will be connected to the back of your TV’s HDMI port. 

In that case, if the Stick doesn’t fit the HDMI port of your TV, you can use the HDMI extender to connect it. 

Now, that’s the preparation you must do when buying the Fire Stick. 

After this, you must prepare the remote and pair it with the Fire Stick to operate the TV. 

The first step in connecting the new remote to the Fire Stick is to get the controller ready:

  • Take the remote out of the packaging. 
  • Check if you have received all the things correctly. 
  • Check if the controller is in good condition. 
  • Add the batteries, and you are done. The remote will take 2 AAA batteries, usually included with the Amazon-brand remotes.

After you have installed the batteries, you are ready to proceed to the next step. 

While buying a replacement remote for your Fire Stick, ensure you have received the right one. 

You cannot use a new Fire Stick remote with an extremely old Fire Stick. 

But you can use an old Fire Stick remote with a new Fire Stick.

The old remotes won’t have many features like the new advanced Fire Stick. 

You can buy 2nd Gen and 3rd Gen remotes on Amazon, but the 1st Gen remote often goes out of stock. 

There are several situations where you need to pair up the new remote with the Fire Stick; for example, you bought a new remote, lost the old one, or want to pair up a secondary remote. 

Let’s discuss them one by one. 

Pairing a new remote with a Fire Stick  

When you set up the Amazon Fire Stick for the first time or after resetting, you have to pair the remote with the Fire Stick that comes along. 

It is the first step to operating the TV and enjoying your favorite subscribed channels. 

I found three methods to pair a new remote with the Fire Stick. 

You can also use these methods to pair a remote that became unresponsive when it suddenly got unpaired from the Fire Stick: 

Using the Play/Pause button 

Usually, a Fire Stick finds a new remote and pairs with it automatically. In that case, you do not need any method. 

But if it hasn’t, you can try this process.  

To pair the new Amazon Fire TV Stick to the remote during the step, press the Play/Pause button on the remote for a few seconds. 

After that, leave the button and check your remote. 

Using the Home button

This process is the most common one and is used by maximum users.

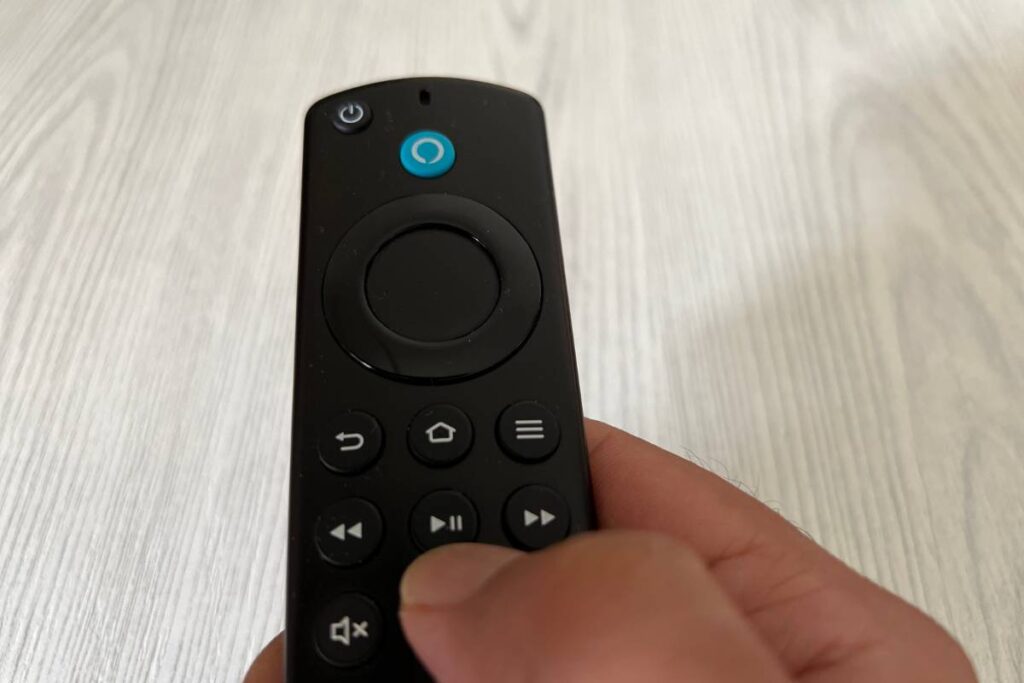
Here, you need to take the remote close to the Fire Stick and press the Home button for a few seconds. 

After that, leave the button and check your remote. 

Sometimes, your remote will blink a small blue light after you hold the Home button for a few seconds. 

The blue light indicates that you have successfully paired the remote with the Fire Stick. 

The three-key combination 

I found this method from YouTube videos. 

I was watching some videos about Fire TV and suddenly found this and even tried it. 

My Fire Stick remote went unresponsive one day. 

It is not damaged or old but went unresponsive somehow.

So, I pressed three buttons for around 15-30 seconds:

  • The navigation Left button
  • The Back button
  • The Menu button ( three horizontal lines beside the Home button) 

After some time, my Fire Stick Remote started responding. 

When you pair a new remote with your Firestick, stay within 10 feet of your TV. 

It will allow your Fire TV stick to recognize and find the remote quickly.

Add another step before pairing an unresponsive or unpaired remote: remove the remote’s batteries for 30 seconds and put it back again. 

Pairing a new remote to the Fire Stick without the old remote 

Let’s say that your original Fire Stick remote got lost or damaged. 

In this case, you will need a replacement remote to operate your Smart TV. 

The new remote won’t get automatically paired like the original one. 

You have to pair this new remote first before you start using it. 

For that:

  • Unplug your Fire Stick from the power source. 
  • Insert the batteries in the new remote. 
  • Plug back the Fire Stick after a minute and wait for the Home screen to load up. It will allow your Fire Stick a fresh start. 
  • Sometimes, a new remote gets automatically connected upon reboot. Try using the remote once. 
  • Hold the Home button on your Fire Stick remote for 10-20 seconds if it does not pair. 
  • Your TV screen will receive a notification that the remote has been paired. If you have missed the notification or you haven’t received it yet, try using the remote once. If it hasn’t paired, repeat the process. 
  • You can also get confirmation if your remote blinks a blue light after you hold it for seconds. The blue blinking light is an indication that the remote has been paired. 

Re-pairing and Switching remotes: Pairing a new secondary remote with the Fire Stick

Did you know you can use multiple controllers for your Fire TV Stick? 

Using multiple controllers for the Fire Stick can be helpful if your existing remote doesn’t work up to your expectations, but you do not want it to let go right now. 

At the same time, you also want a better-performing remote by your side. 

You can do this by pairing a secondary remote with the Fire Stick. Here are the steps to follow:

  1. Go to the Home Screen of your Fire Stick. 
  2. Select SETTINGS in the menu bar. 
  3. On the screen, choose CONTROLLERS & BLUETOOTH DEVICES. 
  4. Click on AMAZON FIRE TV REMOTES on the next window. 
  5. Choose ADD NEW REMOTE on the screen. 
  6. Your Fire TV will now start looking for a new remote. 
  7. Hold down the HOME button of your new/secondary remote for at least 10 seconds. 
  8. Once the TV discovers the new remote, press the middle button to select the new remote on the OLD remote to confirm the pairing of the new remote, and you are done. 
  9. Check whether you can operate your TV with the newly paired secondary remote. 

You can also use these steps if you have lost your old remote, which is still connected to the Fire Stick. 

Using the Fire TV app 

Sometimes, you will need the old remote to pair a new one with your Fire Stick, especially when it is still connected to your Fire Stick. 

But what will you do if you have lost it? Use your mobile phone.

Once, I returned from a vacation, and after freshening up, I turned on my TV to enjoy some shows. 

Unfortunately, I couldn’t find my Fire Stick remote, which disappointed me as I couldn’t enjoy the TV now. 

Moreover, I was worried about how to pair the new one because the old one was still showing connected. 

But after some research, I found a creative way to watch the TV now and pair up the new remote with the old one. 

Take your phone and open the Amazon Fire TV app. 

Download it from PlayStore or Apple Store if you do not have it. 

After opening the app, give all the permission it needs to connect to the Fire Stick. 

This access will allow your mobile phone to act as the old remote. 

Make sure to download the official Amazon app for a trouble-free experience.

Now connect the app with your Fire StickTV:

  1. Turn on your phone’s Wi-Fi and Bluetooth. 
  2. Open the Fire TV app. 
  3. Click on the SET-UP NEW DEVICE. 
  4. From the list, select the Fire TV or ADD DEVICE. Then, you have to enter your account’s login information. 
  5. Enter your PIN to use your mobile as a remote.

Your app will connect to your Fire TV after a few seconds. Follow the on-screen prompts during the installation. 

After this step, your phone will work like a Fire Stick remote controller. 

Now, pair the new remote with the Fire Stick through the app:

Home Screen → Settings → Controllers & Devices → Amazon Fire TV Remotes → Add new Remote.

Your Fire TV Stick will search for a new remote. 

Hold the HOME control button of your new remote at this step until it appears on the Fire Stick list. 

Select your new remote, and that’s it. 

You have connected the new remote to your Fire TV Stick, and it is ready to use. 

Verifying Successful Pairing

Verifying the successful pairing of the new remote with the Fire Stick is very easy. 

You will receive a notification on your TV screen that your new remote has been paired. 

If you miss the notification or do not receive any, check it by using the remote. 

If the remote operates your Fire TV, you have successfully paired your remote with the Fire Stick. 

Troubleshooting Pairing Issues

If you have tried pairing your remote with the Fire Stick following the correct instructions but cannot do it, something else is needed. 

If you are facing this issue, do not worry. You can quickly troubleshoot the problem:

Power cycle the TV

Power cycling involves turning off the device and then on again. 

This resets the device and the network. 

Turn off and unplug your TV from the wall outlet. 

The key is to wait for 1-2 minutes before you plug back the TV again. 

While waiting, press and hold the power on your TV for 30 seconds. 

This will drain the leftover residual power from the TV’s capacitors. 

Power cycling will allow your TV to reset and start afresh. 

The Fire Stick can then search for a new controller or remote nearby and connect to it. 

After plugging in the TV, pair your Fire Stick with the remote again by pressing the Home button for 20 seconds. 

It is the most common method. 

If pairing still fails, power cycle your Fire Stick device. 

Power cycle the Fire Stick device 

Unplug the Fire Stick from the USB port, not the HDMI port. 

Leave the device like that for around 30 seconds and again put back the USB port. 

This will reset the connection and give your Fire Stick a fresh start to search for new devices nearby. 

Check if the Fire Stick has regained its connection and found the remote. Then pair them up. 

If there is still a failure, try to power cycle the remote. 

Power cycle the Fire Stick remote 

Take off the back of your remote and remote the batteries. 

Wait for 30 seconds, and put back the batteries. Ensure to put them in the right direction. 

It will reset your remote. 

This should help in pairing the remote with the Fire Stick. 

If the connection is not established, try replacing the remote batteries. 

Stay within the Fire Stick range

When pairing the remote with the Fire Stick, try to stay closer to the Fire Stick. 

Like typical Bluetooth ranges, you should stay within the Fire Stick range. 

An average range should be within 6 to 30 feet. I prefer staying within 10 feet for better performance. 

Clear path between the remote and the Fire Stick 

Ensure the path between the remote and the Fire Stick is clear for a proper connection and pairing. 

Remove obstructions between them so they do not interfere with the Bluetooth signal that helps the Fire Stick search for a new remote nearby. 

Also read:

Final Thoughts 

Once you have successfully paired your new remote, it is time to binge-watch. You can even leave your remote away from you for a while because the Fire Stick has Alexa controls. Several methods exist to pair a new remote with your Fire Stick, along with different circumstances. Pairing is easy, and you can do it effortlessly without any trouble with the proper steps. 

The Fire Stick usually automatically pairs with a new remote if it detects one nearby. But occasionally, it has to be paired manually. All you need is to follow the correct guidelines to pair the Fire TV remote, and it will take only a few seconds or minutes to pair. After that, you can enjoy watching. 

You can also use your mobile phone as a remote to control the TV through the Fire TV app. But using the Firestick remote with the Fire Stick is more convenient.  

Can I pair a Fire Stick remote with a different Fire Stick?

You can do it, but it will depend on the remote model and the compatibility. All the Fire Stick remotes are not interchangeable. You have to check it before pairing the remote with a different device.

Can I use my TV remote to control my Fire TV?

Yes, your TV’s standard remote can control your Fire TV. You need to activate the HDMI-CEC technology for this pairing.

Can I use non-Firestick remotes to operate my Fire TV?

Yes, you can use some non-Firestick remotes to operate the Fire TV. But for that, you need to have specific Bluetooth profiles. The Fire TV will recognize the Bluetooth. 

Reference: Amazon Fire TV Wikipedia

Can You Play SoundCloud On Alexa?

SoundCloud is a German music streaming service. SoundCloud users can listen to several music, podcasts, and audio tapes. Unfortunately, Amazon devices do not officially support SoundCloud. So, what to do?

You still play SoundCloud on Alexa. You can pair your smartphone, computer, or laptop via Bluetooth and play it on Alexa. You can also create a custom Alexa skill or use third-party skills to play it.  

There are several ways to play SoundCloud on Alexa. This article shares detailed answers about how to play this service on Alexa. So, please read this article till the end to learn about it so you can enjoy SoundCloud on your Alexa. 

SoundCloud and Alexa Integration 

A SoundCloud audio streaming platform is used to share music, podcasts, and audio stories. 

Alexa is a voice assistant service by Amazon. 

Through Alexa, the users can manage several compatible devices. 

Once you set up your voice profile on your Alexa Device, Alexa will listen to all your commands and do tasks according to your commands.

For example, if you want a recipe for any dish, you can command Alexa to search for the recipe. And she will do it. 

You do not have to manually pick up your phone or anything to type and search for it. 

Usually, the Alexa devices do not support SoundCloud. 

It is not compatible. 

Alexa’s compatibility with Soundcloud is currently limited only to several external methods and Alexa’s custom skills. 

However, there has been anticipation about the possibilities of native SoundCloud compatibility for Alexa. 

With this, users can effortlessly enjoy their favorite songs from SoundCloud directly on their Alexa devices without any additional steps. 

It will extend new options for streaming media and playing music, making the user experience more seamless and pleasant. 

Integrating these two platforms can bring together the convenience of voice control with a vast library of songtracks on SoundCloud. 

As a user, you can request songs, artists, and even podcasts from Soundcloud with Alexa. 

Alexa will search for the requested content and play it for you. 

Users can also replay the music, shuffle them, and add songs to queues with Alexa. 

You can relax in your house listening to various audio content. 

How to play Soundcloud on Alexa?

Since Soundcloud is currently not present in the Alexa Devices, you must use external methods to play Soundcloud on Alexa.

I enjoy discovering songs from different artists. 

And SoundCloud has become a vital platform for musicians to share their latest works over the years.

I have Amazon Echo, and I use music apps compatible with the devices, for example, Amazon Music, Spotify, etc. 

Then, I learned about SoundCloud and wanted to try it. 

However, since it wasn’t integrated with Alexa devices, I had to approach other ways to use SoundCloud. 

After researching, reading online articles, and watching YouTube videos, I discovered some workarounds, applied some of them, and succeeded in using SoundCloud. 

Are you in the same situation? Here are some of the most common methods to play Soundcloud on Alexa:

Pair your smartphone with Alexa with a Bluetooth connection

If you have an Alexa device, you cannot play SoundCloud on it. 

But if your smartphone has it, do not worry.

You only need to connect the device to your phone and play the SoundCloud through it. 

There are 2 ways to connect your smartphone to Alexa: directly via smartphone and using the Alexa app. 

Directly via smartphone 

Here, you will directly command Alexa to pair up with your smartphone. 

And then, through the smartphone, you can play SoundCloud. 

So, here are the steps:

  1. Make sure that the Alexa device is turned on. 
  2. Give Alexa a command to pair, for example, “Alexa, pair.” and enable the pairing mode. 
  3. Turn on the phone’s Bluetooth. 
  4. Open the Bluetooth settings in your mobile phone and search for nearby devices. 
  5. You will find the Alexa device. Select and pair with it. 
  6. Wait for both devices to pair. Alexa will notify you when the pairing is complete. 

You can now play Soundcloud on Alexa via your smartphone. 

Using the Alexa app 

In case you cannot talk to Alexa, you can try this method to pair your Alexa device with your smartphone:

  1. Open the Alexa app from your smartphone. 
  2. Go to DEVICES, then ECHO & ALEXA. 
  3. Select PAIR ALEXA GADGET on the settings page. 
  4. Exit the app. 
  5. Now, turn on the Bluetooth on your phone. 
  6. Open the BLUETOOTH SETTINGS in your smartphone and select your Echo device. 
  7. Wait for the devices to pair. Alexa will inform you when the connection is established. 

Now, your device is ready to play SoundCloud through your phone. 

After the Alexa device and your smartphone are paired by Bluetooth, you do not have to go through the pairing process again if you ever turn it off. 

Turn on the phone’s Bluetooth and command Alexa to connect or disconnect to your phone.

If the two devices are unpaired, you will only have to go through the pairing process. 

Pair your computer or laptop to Alexa with a Bluetooth connection

Does your computer or laptop have Soundcloud? 

Just like you have paired your phone to the Alexa device, you can also pair your computer or laptop. 

Here are the steps:

  1. Turn on the Bluetooth of your computer or laptop. 
  2. Go to the webpage alexa.amazon.com and enter your credentials to log in to the Amazon account. 
  3. Click on SETTINGS and select your Alexa device. You can see the settings page for your device. 
  4. Select BLUETOOTH and then click on PAIR A NEW DEVICE. Choose your laptop or computer from the list of available devices. 
  5. You will get a notification from your computer or laptop seeking permission for the Bluetooth connection. 
  6. Agree to the permission to establish the Bluetooth connection between your computer or laptop and your Alexa device. 

Now, you can stream Soundcloud via your computer or laptop on an Alexa device. 

Repeat the pairing process if you ever unpair your Alexa device. 

Third-party skills for Soundcloud

You can use some third-party skills to play Soundcloud on Alexa devices, for example, TuneIn. 

You need to connect the Soundcloud account with the TuneIn skill. 

Here are the steps:

  1. Go to the TuneIn skill in your Alexa app on the smartphone or Amazon website and enable it to turn on the skill. 
  2. Search for SoundCloud, select it, and click the CONNECT button to connect the account with TuneIn. 
  3. Use the on-screen prompts to connect your SoundCloud account to the TuneIn account. Provide your SoundCloud login and password to finish the process. 
  4. Once the accounts get activated, ask Alexa to play their favourite Soundcloud songs and playlists on TuneIn. Ask, “Alexa, play Soundcloud on TuneIn”. 

SoundCloud can play on your Alexa with the help of such adaptable platforms, mostly TuneIn. 

Alexa Custom Skill for SoundCloud

Playing SoundCloud on Alexa via Alexa skills is a very complex method. But it works and also comes with an additional benefit. 

You can run SoundCloud directly on Alexa and with voice commands.

If you have some technical knowledge, you will understand what an Alexa Developer Console is. 

For those who won’t know, Alexa Developer Console is a web-based portal that helps developers make, manage, and publish Alexa skills. 

It can instruct you on creating, managing, and publishing a skill.

Along with that, you may also need some coding experience. 

To make an Alexa skill, you should have an Amazon developer account. 

Your developer account’s login should be the same as the Alexa account.

To make the skill:

  1. Use the Magic Jukebox template to access a code to use it as a foundation. You can also use other templates. I personally prefer this because Magic Jukebox used to be an official Alexa skill. It will work. You can also go to the Alexa-Soundcloud repository on GitHub to use a template of your choice.  
  2. Download the template’s source code on your computer. 
  3. Log in to developer.amazon.com. Your credentials should be similar to those in the Alexa login. 
  4. After you log in, go to CREATE SKILL. 
  5. Name the skill and click on CUSTOM MODEL. 
  6. Choose the process you wish to host the backend resources of your newly created skill. This depends on the programming language your source code uses. 
  7. Tap CREATE SKILL, and wait until the process is finished. 
  8. Open the JSON EDITOR option, take the code from the template, and paste it into this section. 
  9. Save and build the model. 
  10. Find the INTERFACES option. Now, turn on the AUDIO PLAYER by using the toggle switch. 
  11. Go to the CODE tab on the screen. 
  12. Open INDEX FILE, and paste the code from the template’s index here to replace the current code. The process will be the same as you did for the JSON CODE. 
  13. Search for the object responsible for streaming instances in your code. In this step, you will need some coding experience. After you find the object, you have to replace the target URL with Soundcloud’s URL. 
  14. Save the code and deploy. 
  15. Test the new skill by going to the TEST tab. 
  16. Under the tab, check that the SKILL TESTING IS ENABLED option is set to DEVELOPMENT. 

If you follow the steps correctly, you can stream music through Soundcloud on Alexa using this skill. 

To play SoundCloud on your device, find it in MUSIC and link the service.

If you use Amazon Echo:

  1. Open the Alexa app on your phone and click on the menu button. 
  2. Select MUSIC, and then LINK NEW SERVICE. 
  3. Find SoundCloud as an option, select it, and enter your login credentials. 
  4. Now say, “Alexa, play <song name> on SoundCloud” to start streaming. 

If you use an Amazon Echo Dot or an Alexa-enabled device without a screen, link the Soundcloud account through the web interface:

  1. Visit the echo.amazon.com and sign in with your Amazon account. 
  2. Click on MUSIC in the left sidebar and select LINK NEW SERVICE. 
  3. Select Soundcloud from the list, enter the login info, and link it. 

Use Sonos speaker 

One way to play SoundCloud by commanding Alexa without any workarounds is to use Sonos speakers instead of Alexa devices. 

The Sonos speaker supports Alexa and SoundCloud. This will work just like any Alexa device. 

The process only works if you have a speaker from the Sonos brand with an in-built Alexa. 

Additionally, you can play SoundCloud only if you are subscribed to Soundcloud Go+. 

Its premium version provides more options and facilities than Soundcloud Basic or SoundCloud Go. 

If you have the subscription, set up your Sonos speaker:

  1. Add SoundCloud to the Sonos controller app. 
  2. Open the Sonos app using your smartphone or computer and log in. 
  3. Go to SETTINGS and then to SERVICES. 
  4. Select ADD A SERVICE under MUSIC & CONTENT. 
  5. Highlight Soundcloud and click on ADD TO SONOS. 
  6. Follow up with the on-screen prompts and log in to the Soundcloud account. 

Alexa will now have the control to play songs from the SoundCloud platform in your Sonos speaker. 

Command Alexa to play the song, and the speaker will play it for you. 

Begin with different commands and check if the speaker responds like Alexa. 

Then, enjoy music hands-free. 

There are several activities to do:

  • Search songs by Artists and Track. 
  • Browse artists you follow and the music you like 
  • Stream the playlists you have made in the Soundcloud app. 

 Voice Commands for SoundCloud Playback

Initially, you cannot command Alexa to play SoundCloud playback. 

It would be best to do the workarounds to use SoundCloud in Alexa and then command her to play the playback. 

For the Alexa-Soundcloud template you have used to create a custom skill for Soundcloud, you can use the following commands:

  • Alexa, tell SoundCloud to play my favorite tracks. 
  • Alexa, play <song name> on Soundcloud.
  • Alexa, play previous/next. 
  • Alexa, ask Soundcloud for the current track. 
  • Alexa, Soundcloud Shuffle. 

Please search for the skill in your Alexa app, enable it, and then play your songs with the above commands. 

SoundCloud Alternatives on Alexa

If you are an Alexa device user, you should know that Alexa does not support SoundCloud. 

But there are ways to play. 

You need to put a little effort and using external methods to play Soundcloud on Alexa. 

But what if you want to avoid doing the workaround? That’s entirely fine. 

Instead of using Soundcloud, there are several other music streaming apps to play on Alexa. 

Here are some best alternatives that you can stream instead of Soundcloud:

  • Spotify (my personal favorite) 
  • Amazon Music 
  • TuneIn Radio
  • Pandora
  • Deezer 
  • Apple Music
  • TIDAL 
  • iHeartRadio 
  • SiriusXM 
  • Vevo 

Navigate to MUSIC & PODCASTS on the Alexa app and follow the on-screen prompts to enjoy these music services. 

Setting Up SoundCloud Playback 

Once you have made a custom skill to play SoundCloud, you must set it. 

You can follow the process I have shared in the “Create a Custom Skill” point under “How to Play SoundCloud on Alexa.”

To set up Soundcloud Playback as default on Alexa:

  1. Go to the Alexa app, then Skills and Games, and select Connect the SoundCloud account by enabling it. 
  2. Set SoundCloud as your default music provider. Alexa app → Settings → Music & Podcasts → Default services → Choose SoundCloud. 
  3. Control the SoundCloud with voice commands. Just say, “Alexa, play <song name> on SoundCloud. 
  4. You can even make a custom playlist. Say, “Alexa, add happy songs to my workout playlist. Control the playback with basic commands, like PLAY, NEXT, PREVIOUS, PAUSE, SHUFFLE, INCREASE/DECREASE VOLUME, etc. 

Quality and Limitations 

The quality of playing music in SoundCloud on Alexa through these external methods will be just as the other in-built music skills in Alexa. 

However, the audio quality will depend on the music source and the ability of the music-sending and Alexa speaker. 

But the quality might be much better in the devices that support both Alexa and Soundcloud, for example, Sonos speakers. 

The device has an involvement in direct integration with Alexa and Soundcloud.

But there are some limitations:

Soundcloud Premium and Alexa 

To run SoundCloud on Alexa via external methods, you need to be a premium subscriber of SoundCloud. 

You can only play random tracks and search results without the premium account. 

It is limited to basic control, but you should have a premium account for playback within the track. 

Also, you cannot shuffle or repeat the songs. 

Soundcloud Go costs around $4.99 monthly, and Go+ costs $9.99 monthly. 

With a Go subscription, users can enjoy ad-free music and even listen to them online. 

In Go+, along with these two features, users receive high-quality audio, access to the entire catalog of music and sounds, and good compatibility with Sonos speakers. 

So, if you use an Alexa-controlled device like Sonos, you need to be a member of Soundcloud Go+.

Internet connection and track availability 

Internet connectivity or low sound quality of the original track can affect the playback quality on the Amazon Echo and Echo Dot devices. 

Problems can arise if you try playing tracks unavailable in your country. 

Soundcloud will not play songs out of your region or is only available on the Soundcloud app with the premium version. 

Troubleshooting and Tips

Since Alexa devices are not integrated with Soundcloud, we tried some external methods to play Soundcloud. 

So, you might face some troubles while playing Soundcloud on Alexa. 

Here are some troubleshooting tips:

  • Alexa devices should stay connected to a stable internet connection. Weak connections can reduce the sound quality and create interruptions. 
  • Both the Soundcloud and Amazon Alexa apps should have the latest versions, so they should stay updated. 
  • All content won’t be available through voice commands. Add your favorite tracks and playlists to the Soundcloud favorites for easy access. 
  • Few songs won’t play due to region restrictions or because they are only available via the SoundCloud app. Use an alternative streaming service that is compatible with your voice.
  • If Alexa fails to identify a Soundcloud account, disable and re-enable the Soundcloud skill in the Alexa app setting. It will refresh the connection and solve the troubles. 
  • For technical glitches, contact customer support. 

Final Thoughts

Even if Soundcloud is not integrated with Alexa devices, there are several alternatives to use Soundcloud. It has been an excellent advantage for SoundCloud lovers. However, users still wish to make SoundCloud a native service for Alexa devices for better performance. You can connect the Alexa device with your smartphone, computer, or laptop containing the Soundcloud service and stream music and podcasts. 

You can even use third-party apps like TuneIn in your Alexa app, connect the account, and then enjoy songs. You can use Alexa-controlled devices like Sonos. Since Sonos supports both Alexa and Soundcloud, this is one of the best ways to enjoy Soundcloud at its best. 

No matter what external method you use, having a Soundcloud premium subscription is better. It can provide you with good-quality audio and many tracks to play. If you need to enjoy music and are not selective about any apps, try other alternatives already integrated with Alexa, like Spotify, Amazon Music, TuneIn, Pandora, Apple Music, etc. 

Can anyone make a custom skill?

Yes, any Alexa device user can create a custom skill and use it for several purposes, playing Soundcloud being one of them. Amazon provides a free Alexa Skills Kit where users with zero coding knowledge can learn to create and publish skills for Alexa.

Does Google Home support Soundcloud?

Google Home is also not integrated with Soundcloud. Users can play it by connecting it via Bluetooth.

Reference: Soundcloud Wikipedia

How To Reset Fire TV Stick Without Remote?

The Fire TV stick’s remote is essential to operate the TV, especially when you plan to reset or customize the TV interface. But what will you do if you have lost the remote or your remote isn’t working? Don’t worry; there are ways to reset the Fire TV stick without the remote. 

Reset your Fire TV stick using the Fire TV app while connected to Wi-Fi. You can connect the standard remote to the Firestick if your TV has HDMI-CEC technology. OR, connect a keyboard or mouse to the Fire TV by Bluetooth.

Resetting a Fire TV stick without a remote can be daunting, but the steps are easy. Are you facing something similar? Then this article is all you need. It will share some proven ways to reset the Fire TV stick without a remote. 

Why Reset a Fire TV Stick?

Resetting a Fire TV Stick means attempting a Factory Reset for the Firestick. 

Once you approach this, your Fire TV Stick will have all the default Factory settings, and all your customized settings will disappear. 

Of several reasons, the most common reason that calls for resetting the Fire TV stick is troubleshooting the Firestick or buying or selling the used Firestick. 

A few apparent reasons why the Firestick requires a reset as troubleshooting are:

  • The firestick keeps crashing. 
  • Failed updates.
  • Firestick is not connecting to Wi-Fi. 
  • Putting up a used Firestick for sale. 

These might result from temporary glitches or third-party skills not meant to be used in the Fire Tv stick. 

If you are reading this, your Firestick might already have a problem that needs resetting. 

I recall when my Fire TV Stick was not behaving normally, and I needed to reset it. But unfortunately, I couldn’t find the remote.

So, I had to use the Fire TV app from my phone for resetting. 

I also attempted resetting the Fire TV Stick in my cousin’s house using adblink and a computer. 

Her Firestick was constantly crashing, and the remote wasn’t working. 

In her case, both the Stick and remote ditched her. 

Though we could have used the Fire TV app, we both wanted to learn this process out of interest. 

The method was confusing initially and a bit time-consuming. 

However, we managed to make it work successfully. 

Do not worry; I will be sharing about it. 

Note that a factory reset will remove all the applications, customizations, and user data. It will be as good as new. 

Before you follow any steps, ensure that you have your Amazon login information and the logins for your favorite apps. 

Now, why do you need to reset your Fire TV Stick without a remote? 

When you buy a Firestick, it comes with a remote to control the TV with that remote after you connect the Fire Stick. 

Losing the remote is a different story. But there will be cases where the remote might not work. 

Possible reasons could be random glitches or sideloading.

Random glitches can prevent the remote from working correctly. 

Sideloading is a hackery way to add apps not meant to be used for the Fire TV Stick. 

If you have used any such apps, you will know the reason behind the problem. It can further lead to repeated crashes and forced resetting. 

You have the option of remote replacement in Amazon that is compatible with your Fire TV Stick. 

Buying can take time. That’s when these alternative reset methods without a remote become helpful. 

Alternative Methods of Reset

Every Firestick will have a remote to operate after connecting the Stick to the TV. 

Using the remote is the easiest way to reset your Fire Stick TV. 

But what if you lost the remote or it is not working anymore? 

How will you reset the Fire TV stick?

Fortunately, there are multiple alternatives. 

Ask Alexa 

Using Alexa voice commands is one of the easiest ways to reset your Fire TV Stick without a remote. 

You can control the Fire TV Stick with voice commands if you have an Alexa-enabled device. Follow the following steps:

  1. Ensure the Alexa device is connected to the same Wi-Fi as your Fire TV Stick. 
  2. Say, “ Alexa (or the wake word you use), open My Fire TV” to your Alexa device. 
  3. Once the TV app opens, say, “Alexa, go to SETTINGS”. 
  4. One by one, command Alexa, navigate to the DEVICE AND SOFTWARE, select FIRESTICK, and then the RESET TO FACTORY DEFAULTS option, and confirm the reset. 

I learned about this method from one of my friends. 

I have Amazon Echo. If I ever need resetting, I will try this one out. 

I always wish my Fire TV never comes in a condition where I have to reset it again. 

Resetting seems easy, but customizing all the settings over again according to the preferences is quite the work. 

Remember that this method only works when you have previously set up the Fire TV Stick with the Alexa device. 

Using the Fire TV App

The Fire TV app is the next best way to reset the Firestick. 

The app comes in handy and can work like the Fire Stick remote. 

I used this method when I first reset my Firestick. 

All you need is the app and a good Wi-Fi connection. 

The application will turn your smartphone into a Fire TV stick remote. 

The app will have features similar to the remote, for instance, voice research, easy navigation, an on-screen keyboard option, a mouse, etc.

Follow the following steps after installing the app:

  1. After the installation, ensure the phone and Firestick are connected to the same internet. 
  2. Permit the app to access the local network. Set the app and click on SURE when it asks for permission. 
  3. Open the app, and click on SET UP DEVICE at the bottom. After a few seconds, the app will find the nearest streaming devices. 
  4. From there, select your Fire TV to connect the Fire TV with the app. It will take a minute. 
  5. Once the connection is made, the app will turn into a Fire TV Remote Control. 
  6. Click on the top left-corner setting icon to see the menu options for your Firestick. 
  7. From there, select the MY FIRE TV option. 
  8. You will see the RESET TO FACTORY DEFAULTS option. Click and confirm the reset. Resetting will take around 2 to 5 minutes.

No Wi-Fi connection? Use Ethernet cable 

Many TVs will have Ethernet ports at their back. 

Check if your TV has one. 

To connect the smart TV to the internet using the Ethernet cable:

  1. Plug one end of the Ethernet cable into the available Ethernet port on your Smart TV. 
  2. Plug the other end of the cable directly into your router. 
  3. Turn off the TV and then ON using the power button at the back of your TV. 
  4. The Firestick connected to your TV should recognize the wired connection. 
  5. Once you have connected it to the internet connection through the internet, you can use the Fire TV app to reset your Fire TV Stick. 

Reset using the TV remote

If you have lost the Fire Stick remote, you can use your TV remote as a Fire TV remote to reset the Firestick. 

The TV remote won’t be as good as Alexa, but it can help to reset. 

For this process, you need to activate the HDMI-CEC on your TV. 

It usually stays enabled by the default setting with most TV brands, so you can use your TV remote immediately. 

If it is not enabled, follow the following steps to enable it:

  1. Go to the MENU. 
  2. Then go to the SETTINGS option. 
  3. Find the HDMI-CEC option and turn it ON. 
  4. After you have enabled it, your TV remote will work as a Fire TV remote. 
  5. Go to SETTINGS, select Device, and click RESET TO FACTORY DEFAULTS. Confirm the reset and wait for 2-5 minutes. 

Using the Physical Navigation Buttons on the Fire TV Stick

The navigation buttons in your TV can also help in the resetting process. 

Find the navigation buttons on the TV at the bottom and repeat the process by going to the MENU option. 

Menu → Settings → Device and Software → Select the Device → Reset to Factory Defaults → Confirm Reset. 

Keyboard or mouse 

It may seem surprising, but you can use a keyboard and mouse to reset your Fire TV Stick without a remote. 

If the keyboard and mouse are wireless and run on Bluetooth, you can connect them to your Fire TVStick. 

Fire TV Stick can add Bluetooth devices to the TV. 

If you have already connected the mouse or keyboard earlier, you are ready to access Firestick and reset it. 

You can still add them if you haven’t. Follow the following steps:

  1. Make sure that the keyboard or the mouse is in pairing mode.
  2. In your Fire TV Stick, go to the MENU, SETTINGS, and click on CONTROLLERS AND BLUETOOTH DEVICES. 
  3. Click on ADD BLUETOOTH DEVICES. 
  4. Follow the on-screen prompts to pair the keyboard or mouse with the Firestick. 

After you have connected the keyboard or mouse, follow the following steps to reset:

  1. Go to the MY FIRE TV option with the mouse or keyboard. 
  2. Settings → Select Device → My Fire TV → Reset to Factory Defaults → Confirm Reset. 
  3. Follow the prompts and wait 2-5 minutes to complete the reset. 

What will you do if your mouse or keyboard does not run on Bluetooth but is a USB device? Don’t worry, as we have solutions for that too:

  1. Plug the keyboard or mouse into the USB port of the Fire TV Stick. The Firestick will recognize the device automatically. 
  2. Use the keyboard or mouse to navigate to the Fire TV Stick Menus. 
  3. Open the MENU and go to SETTINGS. 
  4. Choose MY FIRE TV and then select RESET TO FACTORY DEFAULTS. 
  5. Follow the on-screen prompts and confirm the reset. 

Resetting using a Computer or Laptop 

This process can be confusing. But do not worry; I will clear things out for you. 

Use this as the last option.

Download the adbLink2 on the computer

The Fire TVs run a modified version of Android OS. 

Software like adbLink2 will provide a link between Android devices and computers. 

You will use adbLink2 to connect the Firestick to your computer and control it. 

The method can work on any computer or laptop that runs on Windows, macOS, or Linux Operating System. 

Before you proceed, you need the Fire TV’s IP address. 

Go to Settings → My Fire TV → About → Network. You will find the IP address; note it down. 

Since you won’t have a remote, follow this process through Alexa App, TV navigation, or other means. 

It is better to keep the IP address beforehand to use it at such times. 

If you cannot access the Fire TV menu, get the IP address from the router login screen. 

Look up the Wi-Fi router for instructions about finding a connected device’s IP address. 

Now, let’s reach the primary process:

  1. Download the adbLink 2 and open it on your computer or laptop. I have used a laptop.  
  2. Enter the Fire TV’s IP address into the Ad Hoc IP field and press CONNECT. 
  3. Click the KEYBOARD option and open the on-screen keyboard. This will now control your Fire TV Stick. 
  4. Press HOME to reach the Fire TV Home screen. 
  5. Use the navigation buttons to go to the GEAR icon in the upper right of the Fire TV MENU and click SELECT. 
  6. Navigate to MY FIRE TV. 
  7. Then, select RESET TO FACTORY DEFAULTS. 
  8. Click on RESET and confirm it. 

You have successfully reset your Fire TV Stick.

Plug the Firestick cable directly into the Laptop

To connect the Fire TV Stick to your laptop, you have to use the Fire TV Stick’s original power cable. 

Plug one cable end into the Fire TV Stick and the other into your laptop.

Download the Amazon Fire TV app on your laptop from the Amazon website. It should be available for both Windows and Mac. 

After downloading the app, open it, and select your Fire TV Stick from the available devices. 

After that, you can control your Fire TV Stick through the laptop. 

To reset the Fire TV Stick:

  1. Go to MENU and then SETTINGS. 
  2. Select DEVICE and then click on RESET TO FACTORY DEFAULTS. 
  3. Confirm the reset, and you are done. 

Remember to use the original power cable to connect the Fire TV Stick to your laptop. 

Advanced Hotspot Fire TV Stick Reset 

If you have a good Wi-Fi connection besides the Fire TV app, you can try resetting your Fire TV Stick with a hotspot. 

All you need is a good Wi-Fi connection and two phones. Here are the steps:

  1. First, turn off your router to let the Fire TV Stick search for a network to connect. 
  2. Then, use your phone to create a mobile hotspot with the same name and password you have used in the Wi-Fi network. 
  3. Use the second mobile to connect to the first phone’s hotspot. 
  4. Turn on your router now for an internet connection. 
  5. After that, open the Amazon app on the second phone, and select the Fire TV Stick you want to reset. 
  6. If you cannot find it, power-cycle the Fire TV Stick and wait for it to connect to the Wi-Fi network it recognizes. 
  7. From there, you can navigate and reset the Fire TV Stick to factory settings. 

Contacting Amazon Support

If you cannot reset your Fire TV Stick with these steps, contact the Amazon support team for help. 

Here are the steps you can follow to contact Amazon support:

  1. Go to Amazon’s Help & Customer Service page through a web browser on your computer or mobile. 
  2. If you haven’t signed in, please sign in to your Amazon account. It will help Amazon’s support team access your account information quickly to help you more effectively. 
  3. Check for the option NEED MORE HELP? in the app. You will find several options to contact Amazon’s support team here. 
  4. Choose CONTACT US or a similar option to start the contact process. 
  5. You will see various categories to select. Choose the one that matches your condition. For example, Fire TV or Amazon Devices. 
  6. Amazon provides multiple ways to contact the support team; check for options like PHONE, CHAT, or EMAIL, through which you can contact them. Choose the one you are comfortable with. 
  7. Based on your chosen method, you must follow the on-screen instructions and prompts to contact Amazon’s support team. It involves filling up forms and choosing how to contact you, like through a chat session or requesting a callback. 
  8. Once you have been connected to the representative, share your problem about resetting the Fire TV Stick without a remote, the model of the device, etc. 

The support team will guide you through the process and give you the necessary steps to reset your Firestick and avoid needing it in the future. 

Restoring Settings After Reset

After you have reset your Fire TV Stick, you have to set up and restore the settings. 

It involves reconnecting your Fire TV Stick to your Wi-Fi, signing in to your Amazon Account, and personalizing the settings and preferences. 

Reconnecting to Wi-Fi network 

  1. Go to the SETTINGS menu and select NETWORK. 
  2. Select your Wi-Fi network and enter the password. 
  3. If you face issues while connecting to the network, reset your router or contact the ISP for assistance. 

Signing into the Amazon account 

  1. Sign in with your email and password if you previously had an account linked to the Fire TV Stick. 
  2. To create a new account or link an existing account, follow the on-screen prompts to complete the signup. 

Personalization and preferences 

  1. Set up parental controls, if needed. 
  2. Adjust display and audio. 
  3. Download apps and games of your choice. 
  4. Explore all other settings and features and enjoy whatever you prefer.  

Preventive Measures

Follow the following preventive measures to reduce the need to reset your Fire TV Stick:

  • Regularly clean the cache and data for the apps you have downloaded. It can slow down the glitches and crashes. 
  • Keep the software of the apps and the Firestick up to date. If you cannot do it manually, set up an auto-update.
  • Check the device storage regularly. Free some space if the memory is nearly full. 
  • Manage the background apps and stop them from running for optimized performance. 
  • Avoid using any third-party skill that is not greenlit for Firestick. 
  • Use a high-quality HDMI cable. 
  • Maintain a good network connection. 
  • Protect from power surges by using surge protectors. 
  • Keep a backup of all the essential apps and data. You can get these data back if you ever reset your Firestick. 

Final thoughts

This article thoroughly explores the numerous techniques to reset a Fire TV stick without a remote. You can try any one of them you like. Using the Fire TV app on the smartphone is by far the easiest option.  

When you do not have an Alexa device or a good internet connection to use the Fire TV app, use other options, like connecting a TV remote with Firestick, connecting a keyboard or mouse, or using the physical navigation buttons. 

You can use a laptop and computer to reset your Fire TV Stick via adblink and Firestick power cable. If you are still having issues with resetting, contact a technician. 

How do I factory reset if the Firestick is frozen?

Press the Back and Right side buttons of the remote control and hold them for 15 seconds. The TV screen will go black and then show up two options: CONTINUE RESET or CANCEL. Choose CONTINUE RESET to reset your TV.

How can I factory reset my Fire TV Stick without using the SETTINGS option?

Press the SELECT and PLAY simultaneously on the remote and hold them for 15 seconds. Or, press the BACK and RIGHT side buttons and hold them for 10 seconds. Follow the on-screen prompts and reset your TV.

Reference: Amazon Fire TV Wikipedia

What Causes A Bright Spot On My Samsung TV? (+Fix)

For years, Samsung TVs have led the global smart TV market with various models providing excellent pictures, elegant designs, and outstanding performance. But, it can develop some faults over time, for example, bright spots. 

Several reasons can make bright spots on your Samsung TV, like a loose or fallen reflector, dislodged diffuser LED lenses, dead or stuck pixels and subpixels, HDMI port issues, or outdated firmware. Whatever the cause, it is fixable. Either you can fix it, or best, hire a technician. 

This is the right place if you are a Samsung TV user with the same issue. Here, I will explain the reasons behind the bright spots in your Samsung TV and what you can do to fix them. 

Understanding Bright Spots

The bright spots on a TV are some areas on the display where the illuminance is much brighter than the other areas on the screen. 

These spots are sometimes also called white spots because the illuminance is too much that it looks white from a distance.

These spots will be relatively brighter and whiter compared to the other parts of the TV screen. 

I purchased a Samsung LED-LCD TV a few years back. 

Everything was good until, one day; I saw some bright spots on the screen. 

I tried cold-booting my TV, changing the picture and brightness settings, and even resetting. But nothing helped. 

I hired an expert. 

He arrived, checked everything, and then informed me that he needed to disassemble the TV. 

Then he showed me how the reflectors got detached from their location. 

The solution was easy. 

He took out some glue and attached the reflectors back. 

The reflectors should stick properly and stay aligned. 

After reassembling the TV, I saw that the bright spots disappeared. 

I encountered the same issue with another TV a few months ago and was able to solve it on my own.

So, are you someone who wants to learn about the solutions to bright spots beforehand, or are you already facing the issue and searching for solutions?

In both cases, this article can be of great help to you. 

The next section shares all the possible causes behind a bright spot on a Samsung TV screen and the ways to fix them. 

Common Causes of Bright Spots and Their Fixes 

There could be several reasons behind a bright spot. 

Below I have pointed out some of the common ones:

External Light Sources

This reason is a very expected one and does not require any troubleshooting. 

You see a bright spot on your Samsung TV screen because some external light sources’ reflection is directly falling upon your screen. 

For example, you have a light at a location. 

When you light this up, besides illuminating the entire room of the location, a reflection falls straight up on the TV screen. 

So, it is important to find the bright spot. 

Whenever we see any such spot, our first instinct is to look around and find out whether any external light sources are causing this spot. 

If there is no such thing, you have some other issues. 

Fix: Get rid of the external light sources

There is no fix for this problem. 

Please find out the external light source and remove it. 

Loose or fallen reflectors 

The bright spots on the Samsung TV are mainly because of the loose or fallen reflectors. 

These reflectors can affect the TV screen’s visuality and create bright spots when they become loose inside the TV. 

Usually, the reflectors inside the TV screen spread light instead of emitting it at a single point. 

But when they move to another location, they fail to work efficiently. 

The reflectors either become loose or fall off somewhere inside the TV. 

As a result, all the lights inside the TV will shine at a single point, giving bright spots on the screen. 

Fix: Reattach the loose or fallen reflectors

The solution to this problem involves disassembling the TV and reattaching the reflectors. 

If you have ever done disassembling before, you can go for the DIY steps I am sharing. 

I have done this work before and will share the steps I have taken to fix the problem. 

If you haven’t, please hire an expert to do the job. 

Before starting, gather the supplies you will need while working:

  • Screwdriver
  • Magnetizers and demagnetizers
  • Prying tool
  • Toothpick 
  • Superglue
  • Gloves 

Now, let’s get to the steps:

  1. Turn off your TV and unplug it from the outlet. Please wait for a few minutes after turning it off. The capacitor is still hot and needs to cool down to avoid scalding and electric shocks. 
  2. Look for the screws at the back of your TV. Hold the perfect size screwdriver and slowly unscrew these screws. You can also use magnetized or demagnetized screwdrivers to make it easier. All the screws will have different sizes; ensure you keep them safe and remember their proper places. 
  3. After unscrewing the screws, lift the cover and remove the back cover of the TV screen. It will be more challenging, so you can use a prying tool to create a gap between the TV and the cover. 
  4. Flip your TV in a position that its back faces the roof. This will make the process easier. Do not worry about the components; they are lightweight and will prevent damage. 
  5. Unscrew the edges of the screen and remove the TV screen. Use a pry tool to lift the screen frame. You will see ribbon cables; disconnect them from the screen. 
  6. Lift the backlight or diffuser panel. These diffusers diffuse the light from the reflectors. You need to lift them to see the reflectors. 
  7. Before you remove the panel, unsnap the bezels connected to the diffuser, take 3 paper pieces, write over them TOP, RIGHT, AND LEFT, and stick them to the respective sides of the reflector with weaker tapes. The diffuser should stay in the right spot. If the spot is wrong, the TV will have a weird display. 
  8. Under the diffuser panel will be the reflectors. You will find some lenses are displaced from their location. This is the reason you are seeing the bright spots. These lenses might get loose or move completely from their place. You have to attach the reflectors in their places. 
  9. Before you glue them back, snug the reflectors slightly if they are loose. It will prevent them from falling off again.  
  10. There will be 3 post-holes or small circles to guide the reflector’s locations. On each reflector, 3 posts should sit on the holes surrounding the LED. When you put the reflectors on the lights, ensure the lens posts sit correctly on the top holes. It will keep them secure and won’t come off quickly. 
  11. To make the process easier, first put the super glue on small paper pieces, dip the tip of a toothpick into the glue, and poke it inside 1 of the post-holes. Do the same for the remaining 2 holes around the LED. 
  12. Slightly twist left and right to place the reflectors on the top of the glued posts. The lens should not move when you make it sit and align properly. Repeat the process for each LED light with the loose reflector. Please do not use too much glue, which can destroy the LED and lower its brightness. 
  13. Now put the diffuser back on the panel. Remember you labeled the diffuser earlier? Follow the guidelines and insert the table surrounding the diffuser into the hooks around the TV. Press the edges of the diffuser and secure it well. Now remove the labels. 
  14. Return and screw back the screen and back cover to the TV back in the same way as you have unscrewed it. First, return and screw the screen, its frame, and then the cover. You can use magnetized and demagnetized screwdrivers to connect the screws tightly. 
  15. Now, put your TV back in its position, connect all the wires, and turn it on. Play some channels, shows, or movies. If you have solved the problem correctly, there won’t be any bright spots on the screen. 

Detached LED diffuser lens or panel 

Another reason could be the fuser lens. 

Its purpose is to scatter light emitted by the LED on the display panel.  

The light won’t get scattered when the fuser lens detaches from the LED. 

Instead, it will give light to one point of the screen, creating bright white spots on your TV. 

The bright spot becomes more evident when you view bright content. 

The effect is less when you receive a dark screen. 

Let me clarify more. 

Televisions will have a backlight in the display panel containing white LED lights equally spaced. 

Each light is covered with diffuser lenses to diffuse the light equally in all directions to make a uniform bright light. 

The lenses are attached with an adhesive, which can get weak over time, thus detaching the lens from the LED lights, and that is when you receive bright spots on your TV screen. 

So, you need to disassemble the TV and reconnect these dislodged lenses back in place. 

Fix: Reattaching the diffuser lenses

To fix the diffuser lenses, you must reattach them to the LED lights. 

For that, you have to disassemble the TV. 

  1. Please turn off your TV and plug it in. Wait for several minutes to let the capacitor cool down. It will avoid electric shocks because the capacitor will still carry some charge even after you turn it off. So, wait for at least 15 to 30 minutes. 
  2. Remove all the screws on the back cover and remove it. Unscrew and remove the attached plates as well. 
  3. Unplug the speaker. It will help to reach the diffuser faster. 
  4. Unclip the ribbon cables attached to the TV borders. 
  5. Lift the screen slowly. Do not bend the screen or put pressure on it, or it will break. You can use suction cups to lift the whole screen uniformly. 
  6. Now remove the additional border pieces that hold the screen layer. 
  7. Carefully remove the other screen layer; you will see the backlight panel. It is a long rectangular board with multiple LED lights.
  8. Check for the bright spots on the LED light panel. These indicate a loose LED diffuser lens. You need to align them properly into the holes over the LED lights. 
  9. Take a good superglue, like b7000 or b9000, and pick some glue with your toothpick and apply gently on the lenses. 
  10. Examine the lenses very well and see how they fit on the lights. Each lens will have a small clip or tab to align with the corresponding LED slots. 
  11. Push the lenses back into place with glue and ensure a secure fit. 
  12. Verify the alignment after you have attached all the diffusers. 
  13. Now, place back the backlight panel, the screen, and the cover to reassemble the TV. 
  14. Plug in the cord and turn on your TV. The bright spot should not be present. 

Backlight Bleeding

The modern LCD TVs will have a backlight that helps illuminate the screen. 

Sometimes this backlight can leak and bleed around the screen edges, causing poor lights and bright spots on your screen, especially when the screen becomes dark. 

Old backlight arrays or LED strips can contribute to backlight bleeding. 

But that’s not the only cause. 

The quality of the display construction or pressure applied to the panel during manufacturing are also some causes. 

While the manufacturing defects or the display construction can be solved by adjusting the brightness levels and picture quality via remote, the backlight array must be replaced. 

Fix: Adjusting brightness and picture quality or replacing the backlight array

Unfortunately, fixing the backlight bleeding can be challenging because it can either be a manufacturing defect or a feature of the display technology. 

You can try fixing it by reducing the TV’s backlight and turning off the auto-brightness for the panel defect. 

Repeat this until the bright spot is no longer visible. 

Or, you can replace the whole backlight array or LED strips. 

Reattaching the LED diffuser lights will only provide a temporary solution if the problem is with the backlight array. 

Also, you will see some brown spots under the lenses, which clearly indicate an old backlight array. 

To replace the backlight array, order an array for your Samsung model and replace it as a whole. 

It is better to hire a technician for this.

I have never had this problem, but one of my friends replaced the backlight array. She hired an expert for this. 

Experts will use the correct type of array and suitable glue and attach it correctly to avoid further issues. 

So please leave it in their hands. 

Poorly seated HDMI cable 

When the HDMI cable is poorly seated, it can create weird noises and display bright white spots on the Samsung TV screen. 

When the cable seats poorly, you might have a:

  • Faulty HDMI cable that has broken somewhere. 
  • A damaged port that contains broken pins. 
  • You have a poor HDMI connection. The cable and connector might not be properly coming in contact with each other. 

Fix: Clean the cable points

To fix the problem:

  1. Turn off your TV and remove the HDMI or other cables connected to the appliance. 
  2. If there is any compressed air, use it to clean the contacts of the cable and the connector. If you do not have compressed air, blow air with your mouth gently on these points.
  3. Firmly push the cables back into the slots and turn on your TV. 

If the problem remains, use a different HDMI input. Most Samsung TVs will have 3-4 HDMI ports. 

If there is one on a different part of the TV, try that once, as it should have a separate connection to your TV’s main board. 

Plug the cable into the new port, note down the number next to it, and select the HDMI input on the TV with the INPUT or SOURCE button or the INPUT or MENU button on the TV. 

Also, try removing the external devices, like those connected by BlueTooth, coaxial, or signal cables. 

It will let the TV have a power cable going into it. 

Dead Pixels and Stuck Subpixels

When the light-emitting pixels of your TV get damaged, your screen will show bright white spots. 

Pixels are very tiny elements that make up the TV screen’s image. 

The LCD TVs will have hundreds and thousands of pixels in the broader TV screens. 

For example, if you have a TV with a display of 1920×1080, there will be 1,920×1,080 = 2,073,600 pixels on the TV. 

There could be several types of defective pixels. 

But for bright spots, you will have a hot pixel, which happens when the pixels’ transistors are stuck or dead. 

It further creates a bright spot that is always on and stands out, surrounding the other pixels. 

If the spot is tiny, you have a fault on the main board. 

Despite being less frequently associated with such cases, the problem could be in the T-Con board.

T-Con board is more associated with the horizontal and vertical line issues across the screen

Fix: Remove the hot or defective pixels

A hot or defective pixel can remain constantly on instead of cycling on and off like the other pixel, which is why you see the bright spot. 

Here are 2 proven suggestions to fix the hot or defective pixel:

  1. Wait and watch for some time. Sometimes the stuck or hot pixels can disappear on their own. But there is no specific duration for it. 
  2. Rub the stuck pixel with a damp cloth or a point-soft item without putting any extra force. Do it when the TV is turned on. If the pixel is stuck, this method might fix the problem. 

While these can help resolve the bright spot issue caused by hot or stuck pixels, there is no guarantee that it will work. 

If you have other issues, you need to inspect and try the solutions accordingly or hire a technician to get them fixed. 

Pressure Damage and Physical Impact

Sometimes, pressure and physical damage can create bright white spots on the TV screen. 

This can happen when the TV is mishandled while shipping or later. 

Maybe some hard physical pressure has somehow damaged the screen, for which you will see bright white spots. 

Another reason could be a manufacturing defect. In this case, you can replace the TV if you still have a warranty period. 

Fix: Try preventing the pressure and hire an expert to repair it

In this problem, you do not need to fix it. 

Call the technician, and he will deal with it. 

The problem will be fixed without payment if you have a warranty period. 

Without the warranty, take the TV to an appliance store for repair. 

You may have to pay for the repair. 

TV’s firmware or software is not updated

Software and firmware updates in Samsung TVs can create issues, and bright spots are one of them. 

With any appliance, it is essential to check the updates regularly and keep it updated. 

Smart Samsung TVs support auto-updates of the firmware, but sometimes they can turn off. 

Fix: Update your Samsung TV’s firmware

Check that auto-update is turned on. 

If not, try the following process to update the firmware and auto-update it to prevent repeated manual updates:

  1. Press the MENU or HOME button on the remote and go to SETTINGS.
  2. Click on SUPPORT and then SOFTWARE. 
  3. Agree to the terms provided on the screen and switch to AUTO-UPDATE. 

For the older TVs, you have to update it through USB:

  1. Press the MENU or HOME button on the remote and go to SETTINGS. 
  2. Go to SUPPORT.
  3. Then go to CONTACT SAMSUNG or ABOUT THIS TV. 
  4. Note down the MODEL CODE and SOFTWARE VERSION currently installed. 
  5. Go to SAMSUNG’S SUPPORT site and enter the model number. 
  6. Select MANUALS & DOWNLOADS to look for the newest version. 
  7. If this FIRMWARE VERSION is later than the version you have noted, download it, along with the FIRMWARE UPDATE USER MANUAL. It will give you complete instructions about installation. 

Display Panel Quality and Manufacturing Defects

Defects in the panel quality can also create bright spots on your Samsung TV screen. 

If this is the problem, your TV screen will show bright spots when the TV displays light color images or white graphics.

Some displays will have manufacturing defects that lead to such issues. You can replace the TV if you want. 

Or, if a repair is possible, you can go for it. 

If your TV has a warranty period, your technician will do it for free. 

They will either guide you on the phone or reach your house to fix it. 

Other fixes 

If you cannot fix your TV’s bright spots with the above troubleshooting steps, try the fixes I will share in this section. 

Sometimes, temporary glitches can cause bright spots. 

The following resetting, picture setting, and factory resetting of the TV can solve the issue. 

Cold boot your TV 

Since the technologies have improved, there are chances of temporary glitches. 

So, the bright spots in the Samsung TV can happen when something gets stuck in the TV’s flash memory. 

This can further create issues in the TV. 

Over time, the bright spots will seem like purple spots. 

This happens while you are watching TV.  

Power cycling or cold booting the TV will remove the spot and reset your mainboard without losing the personal settings. 

Here are the steps:

  1. Please turn off the TV and unplug it from the electrical outlet. 
  2. Hold the physical power button on the TV for at least 15 seconds and leave it. 
  3. Wait for 30 minutes for the residual power to drain from the capacitors. The capacitors store the charging for several minutes. 
  4. Plug the TV back and turn it on. You will see a red light if the process is successful.

You must wait for a full 30 minutes before plugging in the TV. 

This may seem a basic step but do not overlook this. 

Sometimes, this process can help eliminate the bright spot on your screen. 

Change the picture settings

Most Samsung TVs will have the option to change the color temperature or other features of the picture. 

Navigate to the HOME screen, SETTINGS, and the PICTURE menu with your remote. 

Here you can try various picture modes. 

Try some of them and see if you can remove the bright spot. 

If you cannot do anything here, go to the EXPERT SETTINGS. 

Here you can change the color space of the TV. 

The changes in this option can help you remove the bright spot. 

You can use the COLOR and TINT options, change the GAMMA and WHITE BALANCE, and receive decent picture quality without any spots or tints. 

Factory reset the tv

Choose this option as a last resort. 

Factory resetting your Samsung TV will return your TV settings to the factory settings. 

It will delete all the personalization features, downloaded apps, and connected devices. 

However, it can be worth a try.

To factory reset the Samsung TV:

  1. Press the MENU or HOME button on the remote controller and then go to SETTINGS. 
  2. Go to GENERAL PRIVACY, and then click on RESET. 
  3. Enter the PIN 0000; it is by default for Samsung. 
  4. Then select RESET in the popup option. 

If you do not have a remote, go to the same menu items with the physical MENU button. 

It will be under the Samsung TV’s logo, next to the POWER button. 

Press the button and use the VOLUME + & – or CHANNEL + & – buttons.

This should solve the bright spot issue. 

If the spot is still there, it is time to hire a technician for repair. 

Contacting Samsung Support

If the problem is more profound or you lack previous technical knowledge, please get in touch with Samsung support to hire an expert. 

Samsung support will connect you to a representative who will guide you through several troubleshooting steps to fix the problem. 

If the problem gets solved, good. 

Otherwise, the support team will send a technician to your house to fix the problem.

It is better to hire an expert because they have better knowledge than you. 

So they will diagnose and solve the right issue without any damage or extra effort. 

Additionally, you do not have to pay the technician for the repair if you have a warranty. 

If the appliance has a warranty period, and you do something wrong through the DIY troubleshooting steps, it can void the warranty. 

Trying DIYs is fine, but do it once the warranty is over.

Please get in touch with the Samsung support team for help before trying any of the above DIY troubleshooting steps. 

Preventing Bright Spots

Some issues like diffuser lenses, reflectors, or pixel issues cannot be prevented because we do not know what’s happening inside. 

But you can try and prevent other issues. Here are some preventive measures to follow:

  • Check all the cables and the HDMI ports to ensure everything is tightly connected. If any cable is damaged, call an electrician to replace it. 
  • Try adjusting the backlight settings and brightness to prevent bright spots. 
  • Keep your TV firmware updated from time to time. 
  • Avoid putting any pressure or physical damage on your TV screen. When the product is shipped, tell the carrier company to carry the product carefully. 
  • Remove any external light sources from around your TV. 

Final thoughts

Bright spots on Samsung TV result from various reasons. Though some require an expert’s attention, others can be solved at home.

Loose reflectors, defective pixels, backlight bleeding, and dislodged diffuser lenses are some of the most common reasons. The solution to these problems mostly requires disassembling the TV. 

Though these require an expert’s attention, you can solve them at home if you have previous knowledge and experience.

Others include outdated firmware, HDMI ports not seated, and external light sources. These can be solved at home easily.

Sometimes, temporary glitches can cause the issue. Cold booting, adjusting the brightness levels and picture settings, and factory resetting can solve the problem. 

Some issues are manufacturing defects. To solve these, you need to call a technician for a repair or a replacement.

It is better to hire a technician if you don’t have any technical experience, especially if the appliance has a warranty period. Otherwise, DIYs can void the warranty. 

Why does my Samsung TV have a bright spot at the bottom?

The issues might be something stuck in the flash memory, dislodged LED diffuser lenses, cracked backlight diffuser layer, or loose reflectors. Try cold booting or seek professional help. 

How much will fix the bright spots on my Samsung TV cost?

Usually, it will cost around $100 to $150, including the labor cost. But it depends on your region, the TV’s problem, and the effort it takes to solve it. 

Reference: Samsung Wikipedia

How To Empty Keurig Internal Tank? (For All Models)

Having a coffee maker at home is convenient, but that isn’t enough. It also should stay in the best working condition; for that, you need to empty the internal tank of the machine. 

Unplug Keurig’s coffee machine, empty the reservoir, adjust the floating disk, and let it drain by brewing. For a comprehensive cleanup of the internal tank, remove the drip tray and the K-cup, and disassemble the machine to access the tank and empty it. 

It is just a quick overview. To delve deeper into the cleaning process of the Keurig coffee maker, read this article till the end to discover the different ways to empty the tank for different models and how proper maintenance improves the brewing process. 

Why Empty the Internal Tank?

Keurig coffee maker is the most popular choice for coffee lovers. 

Since it is an appliance, it will require regular care and maintenance to stay in the best condition for the long term. 

Emptying and cleaning the machine is one of the best maintenance you can give the coffee maker. 

I recall a time when I had neglected my Keurig coffee maker in terms of cleaning. 

I went on a vacation and did not empty the tank. 

When I had my first coffee after returning, it tasted too bad, and the smell wasn’t aromatic enough. 

I first thought that maybe the coffee had gone bad. 

But the taste was the same even after I bought a new coffee. 

So, I started checking my machine. Upon inspection, I found the accumulation of minerals and coffee oils. 

It explained the coffee’s weird taste and the reason behind the slow brewing. 

Over time, the machine will accumulate coffee ground remains, oils, and minerals from the water. 

Several issues will arise if not cleaned properly:

  • If not cleaned, these materials will clog your machine badly. This will further reduce the machine’s efficiency in brewing coffee. 
  • With these impurities inside the machine, you will receive a terrible taste in your coffee.
  • The machine will either slow the brewing or won’t brew. Over time, it will also struggle to pump water. As a result, the machine will overheat and damage quickly. 
  • The machine will brew very slowly, you receive only grounds, or it’s giving you very weak and less coffee. 
  • A dirty coffee maker becomes a breeding ground for mold and bacteria. It can further threaten your health, affecting your immune system, allergies, and asthma. 

It is essential to empty your coffee maker to avoid these problems, especially when not using it too long. 

Even if you are not going anywhere, emptying and cleaning the tank is essential. 

It will remove all the leftover residue, which can stay even after you use up all the water in the reservoir. 

Safety Precautions

It’s always captivating to learn something new. 

You must be excited to learn how to empty Keurig’s internal tank and increase its efficiency and lifespan.

But before you jump to the steps, you must be aware of some safety precautions. 

Following these measures will keep both you and the coffee maker safe from injuries. 

So, what are these safety precautions? Let’s see:

  • Before starting any DIYs with your machine, you should switch off your coffee machine, especially when you disassemble it. However, sometimes you may not need to unplug; it depends on the machine’s problem you have and its troubleshooting steps.
  • After you have switched off and unplugged your coffee machine, you need to give it some time to cool down if you have just used it. It will keep you from getting scalded. 
  • For thorough cleaning, you must first remove the drip tray and the K-cup, as these can give you access to some water reservoir parts. Carefully remove them without applying any force. 
  • When you tilt your machine to drain the remaining water, put some towels or cloth around the machine to catch the spills around the area. It will reduce messiness and accidents. 
  • While tilting the machine to collect the leftover water, it is best to tilt it towards the sink. Water can spill directly into the sink instead of spilling around the countertop or the floor. 
  • Avoid using sharp objects unless needed. These can damage the machine’s fragile parts and even harm you. However, you may need them to cut some ties; otherwise, do not use them. 
  • Do not blindly follow the steps and processes I have shared, especially for disassembling and reassembling. Always consult your manual owner and then go for it. 
  • While working on the internal tank, check for physical damages, frayed wires, etc. If you catch and fix these issues initially, you won’t face any issues later. It will also stop you from using the machine and prevent severe damage. 

How to empty the internal tank: No disassembling?

There are two ways to empty Keurig’s internal tank: disassembling the machine and emptying the tank without disassembling the machine. 

There are two tanks: 

  • In the outside water tank, you add cold water for brewing the coffee. In most models, this tank is detached and can be separately washed. 
  • The internal water tank is inside the machine; you cannot access it unless you disassemble it. This tank stores and provides the water needed for brewing coffee. It is a reservoir that holds enough moisture that is heated and used in brewing. 

The inside tank supplies continuous water for efficient heating and convenience brewing by pushing a significant button. 

You do not have to drain the inside water tank regularly if you are a regular Keurig user. 

It is circulated and stays clean. 

But if you are out long, drain this tank to prevent damage. 

In this part, I will discuss cleaning the internal tank without disassembling the coffee machine. 

I follow these steps for my Keurig 2.0: 

Step 1: Removing Water Reservoir

Remove the water reservoir from the Keurig, the detached one that holds cold water. 

Throw away all the water in the sink and put it back in your machine. 

Your Keurig machine will display ADD WATER. 

Step 2: Trick your machine with the floating disk 

Once you remove all the remaining water from the reservoir, it will no longer brew. 

At this point, you can trick the machine into thinking the reservoir still has some water for brewing. 

Inside the water tank, you will find a small plastic disk floating up when the tank is filled. 

The disk regulates the amount of water present in the reservoir. 

Try accessing the inside of the tank and slide up the disk with your finger till it reaches the top of the track. 

Then push and fix it in place. Put the lid of the reservoir back. 

The light will stop flashing, and the screen of your Keurig will show ADD WATER. 

Step 3: Run the Keurig without a pod

Open and shut the lid of your Keurig coffee machine as if you are loading the K-cup and selecting a size to brew. 

Do not put the coffee pod. You have tricked your machine into draining the internal tank completely and not brewing any coffee. 

So, the pod is not needed. 

Your coffee maker will brew a cup of coffee with the remaining water in the internal tank.

This will empty all the water left in the tank. 

The remaining water will be collected in the cup or the carafe.

Step 4: Discard the water 

Throw away the water dispensed from the Keurig after this brew. 

You have successfully removed all the remaining water from the internal tank when your machine’s screen should display PRIME.  

There might be a significantly less amount of water left in the tank after this technique.

If this does not work, you must go for the manual emptying method: emptying the tank by disassembling the machine. 

Emptying the internal tank for Keurig Mini, Keurig Mini Plus, or K15

The steps I will share here won’t need any disassembling. Also, it will not void your model’s warranty.

You need:

  • Your coffee machine
  • Any coffee mug

So, if you have any of these models, you can try the following steps to clean the internal tank:

  1. Turn off your brewing machine but keep it plugged in. 
  2. Keep the mug or a container under the spout of the machine. Any cup will work since you won’t be drinking whatever comes out. 
  3. Lift the brewer handle as if you are loading the K-cup for the coffee, and then put down the handle. 
  4. Press and hold the BREW button until the water comes from the machine and pours into the mug. It will take around 5 seconds to drain. 
  5. Once you are done draining the tank, discard the water. 

Emptying the tank by disassembling: Manual Emptying and Draining

Here, you must disassemble the whole machine and discard the remaining water from the internal tank. 

This is a very complicated and time-consuming process. 

So, I suggest you take your time and patiently empty the internal tank successfully. 

Things you need are:

  • Flat-head screwdriver
  • Needle-nose pliers
  • Small zip ties 
  • Scissors 
  • Small plastic straw 

I have used these steps for my Keurig 2.0. But these can be applied to other models as well, like Keurig Classic or K40:

Step 1: Pull the pod handle and remove the screws 

You won’t be able to access the water tank from the bottom of the machine. 

So, you have to get access by removing the top section. 

You need to remove the lid of the pod compartment like you are going to put a K-cup. 

Two screws will be present on the underside of the pot compartment lid. 

Unscrew them with a flat-head screwdriver. 

Step 2: Remove the top of the coffee maker 

Once you are done unscrewing the screws, you can easily remove the top area of the Keurig coffee maker. 

This top section will have the name KEURIG on the front. 

Remove the loosened top gently by lifting it forward and upward. Now, the inner tubing of the machine will get exposed. 

Step 3: Remove the silicone tubes from the internal reservoir 

The inside of the machine will contain two tubes connected to the internal reservoir’s top. 

One will be shaped as L facing sideways and the other from the top.

Loosen the zip ties and remove the tubes. 

Hold the zip ties with the needle-nose pliers and shake them to loosen and slide them off their place. 

Now, you can either wiggle the zip ties up and off the metal attachment with the pliers or snip them off to replace them with new ties. 

Step 4: Empty the Water Reservoir

Move the brewer upside down and empty the L-shaped opening tube.

For faster cleaning, put a thin straw over the opening of the detached tube on the water tank’s top. 

It will improve the air circulation in the tube and increase the draining speed. 

Drain the tubes until there is no water left in the tank. 

Step 5: Reassemble the coffee maker

Once you finish this, it is time to reassemble the coffee maker. 

Reattach the silicone tubes after drainage. 

If you have only loosened the zip ties down, wiggle them back and secure the tubes. 

If you have completely removed them, use new zip ties and secure the tubes.

Put back the Keurig’s top section, and you are good to go. 

Another method of emptying the tank is by disassembling  

The tools needed here are:

  • Flat-head screwdriver
  • Needle-nose plier
  • Phillips Screwdriver 
  • Plastic syringe or straw 

Following the manufacturer’s manual is the first step before disassembling the machine. 

The manual won’t tell you the draining process but will tell you the location of the different components inside the machine so that reassembling gets easier. 

The primary purpose is to detach the hose connecting the Keurig water tank or the reservoir to the internal pump. 

The location of the machine’s hose will depend on the machine’s model. Let’s get to the steps:

Step 1: Read the manual first

Read the manual to know the location of the hose of your Keurig model.

It will help you determine whether you need to remove the bottom or side panels. 

Once you get the right location, you can easily remove the required panel to access the hose and reassemble it correctly. 

Step 2: Remove the bottom or side panel 

Unplug the coffee machine, and let it cool down for some time. 

At least 30 minutes should be given to the machine to cool down. 

The water in the hot water tank will have the chance to cool down, and emptying will be safe and easy. 

Now take a flat-head screwdriver to remove the screws of the panel. 

Step 3: Disconnect the hose

The house is white and made of plastic. 

Disconnect this by pulling out the fitting. 

If your model has the hose attached to a cable, cut the cable with scissors or knives. 

Before cutting, carry extra ties to replace the old one and connect the hose back correctly. 

Step 4: Drain the water 

Now drain the water into a cup or a container by placing the hose end near it. 

This will take time, at least for some minutes. So, be patient and let it drain completely. 

Step 5: Reconnect the hose and reattach the panel

Once the tank is entirely drained, push the hose back into the fitting and hook it to a tie if needed. 

Check the manual about properly connecting the hose and reassembling the Keurig machine. 

Emptying the machine for long-term storage 

For long-term storage, you need to disassemble the machine. 

Gather tools: 

  • Needle-nose pliers
  • Philips screwdriver
  • Plastic syringe 

You will need 15 to 20 minutes to complete this process. 

But it is an effective method if you are planning to go somewhere for an extended vacation and want to store the machine. 

Before you consult the steps I share, consult your manufacturer manual and check that these steps suit your Keurig model. 

In this section, I will discuss cleaning the Keurig 2.0 for long-term storage. 

It is the most common model in households:

  1. A chrome ring will be present at the top back side of the machine. This needs to be detached. Lift the handle and expose this ring. You will notice 5 snaps fastening the ring at the brewer top. Remove these snaps by pushing them in and up with force.
  2. Close the handle and turn the brewer upside down. Remove the 6 screws on the bottom of the machine with a screwdriver. This will remove the entire front and side panel of the coffee pot. 
  3. Once you have inverted the brewer, open the front of your machine. If the model has silver plastic, remove it by sliding it off first. These pieces will be attached to some hooks. First, push them laterally, unhook them, and pull them outward. Apply some force and slide out the front panel.
  4. Remove the two screws from the top of the water reservoir side with a Phillips screwdriver. While removing, the only thing that holds the exterior machine will be some plastic snaps. With a flat spatula-like object, start prying the wedge between the top and side of the brewer, and separate the entire top of the brewer. 
  5. Now remove the exterior casing to see the internal components. Use some force and unsnap the exterior from the base and remove it. 
  6. Remove the water intake system by unfastening the 3 clips attaching it. When you remove these, the piece should stay disconnected from the 2 tubes attached. Water will come out, and you will see some water inside the black piece. Press the middle of the black intake piece, shake to drain the water entirely, and keep it aside. 
  7. Two screws will hold the entire water tank, the pump, and the internal filter. Remove the internal filter by unscrewing the base of the motherboard with a Phillips screwdriver. The screws are slightly smaller than the others; keep them separate and safe. 
  8. Turn the brew to the other side and remove the screw at the top of the white plastic washer connecting the whole water tank, pump, and internal filter to the base. Detach the water tank and pump assembly. Lift your machine and slide out the tank carefully without hurting the wires. 
  9. Turn the brewer back to the motherboard side and detach the filter behind it from the pump assembly. Empty the filter. Find the tube on the top of the water tank and detach it to let the air displace the water inside while draining. 
  10. Disconnect the tube leading from the pump to the water tank. At this point, water can rush out. So, direct it over a basin or sink. 
  11. Water will still be left behind in the pump assembly. Use a syringe on the entry tube to remove this leftover water from the assembly. Take a tube from the pump and connect it to the syringe at the entry at the top of the tank. 
  12. After you have reached this step, reassemble your coffee machine by following your manufacturer’s manual. Your machine is entirely empty, and it is ready for long-term storage. 

Regular Maintenance Schedule

Preparing a regular maintenance schedule for a Keurig coffee maker is the best way to keep your machine efficient in the long run. 

You can maintain them weekly, monthly, or annually. 

Or, you can follow the routine that I personally follow for my Keurig coffee maker:

Daily or weekly maintenance 

Empty the drip tray and the K-cup holder after each use. 

Please remove it from the machine, empty the residual water, and keep it back. 

It will prevent mold and bacteria growth and keep these components clean and healthy. 

If you drink coffee multiple times daily, perform the cleaning twice daily. 

Wipe the machine’s exterior weekly with a cloth to clean the spills, splashes, and coffee residue. 

It will keep the machine clean and tidy. 

Every 1-2 weeks 

Remove the detached water reservoir and wash it. 

First, empty the remaining water and then clean it with mild soap and water. 

Rinse the reservoir with fresh water to remove the soap residue and let it air dry before reinserting it. 

Monthly maintenance 

Over time, the machine will gather coffee oils and mineral residue from your water type.

Tap water contains some minerals which get deposited in the machine’s reservoir. 

If not cleaned, these minerals accumulate, block the water flow, and brew slowly. 

So, descale your machine with a descaling solution every month. 

You can also use vinegar instead of a descaling solution, followed by a good rinse with normal water to remove the vinegar smell.

Every 3-6 months

Some Keurig models will have a detached water filter in the reservoir. 

If you have one, you must replace the filter every 3 to 6 months for smooth water flow. 

Filters can trap impurities and, over time, create blockage. So, change or clean them. 

Yearly maintenance 

Consider a thorough cleaning: cleaning or replacing the water filter, descaling the machine, and removing and cleaning the other components like the K-cup, the drip tray, and the reservoir. 

You only need to clean the machine by disassembling it if you go away for a long time and leave it behind or store it. 

If you still want a thorough cleaning annually, consider doing it without disassembling it. 

Extra tips 

  • When you do not plan on using the machine for extended periods, clean it thoroughly for long-term storage and store it in a dark, cool place. 
  • Try using filtered water instead of tap water. This will reduce the chances of mineral and scale buildup and frequent descaling. 
  • Some Keurig models come with digital displays that will provide maintenance reminders. Follow these reminders and the prompts for the necessary cleaning tasks. 

Final thoughts 

Regular cleaning and descaling keep your machine good in the long run. A coffee machine not doing its job can be very frustrating, especially in the early morning.

A coffee maker has two water tanks: an external tank with cold water and an internal tank that keeps hot water ready for brewing coffee.

The external one can be easily cleaned and descaled. So, you can perform this cleaning regularly, every day or every week. 

But cleaning the internal tank takes effort. It is necessary when you are going out for weeks and leave it behind, or you want to store the machine for a long time.

Before you follow the cleaning steps I have shared, learn how to disassemble and reassemble the machine correctly and the location of the internal components.

This will help you to disassemble and reassemble the machine quickly before and after cleaning. 

Begin with the process that does not require disassembling. If that works, you do not have to disassemble it. Suppose it doesn’t disassemble the machine to clean the internal tank.

Always unplug your machine and let it cool down for 30 minutes before disassembling. Once you learn how to empty a Keurig internal tank, you can enjoy tasty and flavorful coffee whenever you want.

It will also increase your machine’s lifespan. 

How do I clean my Keurig’s water reservoir? 

To clean the cold water reservoir outside the machine, remove it and dump the lousy water into your sink. Also, you can clean it with soap or a solution of vinegar and water, followed by a rinse of plain water.

How often should I empty Keurig’s internal tank?

You do not need to do it regularly. Emptying the cold water reservoir outside (detachable one) every 1-2 weeks is enough. Draining the internal tank is needed when you go for a vacation and leave the machine behind or store it in a place that gets below freezing.

ReferenceKeurig Coffee Maker

Troubleshooting Keurig Coffee Maker: 30 Common Problems+Fix

Keurig coffee machines are famous and have become a lot more accessible in recent times, but they do not come without flaws. From time to time, it will break down. So, owners should learn a few basic troubleshooting steps to fix them independently. 

You don’t have to replace the coffee maker or hire an expert constantly. For example, if the Keurig coffee maker doesn’t brew coffee, troubleshoot it by cleaning the filter and water lines or checking the alignment of the machine parts. 

There are numerous other problems, and as coffee machine owners, people must learn to troubleshoot them. This article combines all possible causes and simple troubleshooting steps to avoid future issues. 

Common Keurig Coffee Maker Issues and how to troubleshoot them

Enjoying a morning cup of coffee is made simple and quick with the convenience of a coffee maker.

A Keurig coffee maker is a true wonder of modern times, especially for coffee addicts like me. 

I bought my first Keurig coffee maker a few years back, and it has been my savior since then. 

One cup of coffee every morning fuels my whole day. 

Although a Keurig coffee maker gives you a quick brew every morning, everything comes with a cost. 

Keurig coffee makers will encounter specific issues like every other electronic device. 

It is better to learn some DIY troubleshooting steps beforehand to fix the coffee maker yourself instead of replacing it or calling an expert every time. 

Keeping this in mind, I started researching the coffee maker, the problems it can face, and how to troubleshoot them. 

Whether you are looking for troubleshooting steps for some existing issues in your Keurig coffee maker or learning them beforehand to stay prepared, this article has everything you need. 

So, let’s have a look at the problems and their troubleshooting steps:

Problem with power connectivity on the Keurig machine

Problems related to power and connectivity are one of the common issues found in most Keurig coffee makers. 

Fortunately, the solutions are easy. 

Suppose you press the power button of your Keurig coffee machine, but nothing happens. 

It can occur any time of the day, but the mood gets poorly disturbed if it happens during morning coffee time. 

There are very few reasons for this:

  • The machine is not plugged in properly
  • The power outlet is not working
  • The power button is not pushed properly 

So, check the plug and see if you have securely plugged it in. 

Next, check whether the switch is pushed correctly. 

If both these are done correctly, you might have a problem with the outlet. 

Try plugging in other appliances in the same outlet.  

If the appliances fail to turn on, you need to examine the outlet and get it fixed. 

If the other appliances work, but your coffee machine is the only one not working, some internal damage may have happened. 

Get the appliance checked by an expert.

If you have a Keurig 2.0 or Plus, your machine will have an LCD where you will find the power icon on the lower right. 

You need to press that to turn on the coffee maker. 

Keurig turns on and off automatically

It is a discerning issue with the Keurig coffee maker. 

A suspected reason is ENERGY SAVER mode, or AUTO ON/OFF mode, is turned on. 

Another reason could be a problem with the water reservoir’s magnet.

Some Keurig coffee makers will have an ENERGY SAVER mode. 

In this mode, the machine will turn off after some time. 

The same happens in the AUTO ON/OFF mode for an automated brewer, where the machine will switch on and off unexpectedly. 

A simple fix is to turn these features off. 

When it comes to the magnets, the magnetic contacts in the water reservoir should stay in contact with the magnets on the machine. 

If there are not, the machine will turn off. 

Remove the reservoir, check, and realign the magnet, and put the water reservoir back in place. 

Brewing Problems

Sometimes the machine won’t brew when you choose the BREW option. It can be very frustrating.  

Here are a few things to look at:

The attachment and alignment of Keurig’s parts

When you remove the reservoir or try cleaning any other parts of the Keurig coffee maker, the parts of the brewer might be misaligned or positioned wrong. 

Try checking the cup holder, the water tank, the K-cup lid, and the handle. 

These should be attached correctly. 

If not, attach them well. 

Also, ensure that you have filled the water tank correctly for brewing. 

Clogged needle 

A clogged needle can sometimes create issues in brewing coffee, especially when they are clogged. 

You can clean it using a paperclip. 

Clogged filter

Some Keurig coffee makers’ water reservoir contains a filter. When this filter gets clogged, it will stop the water from pumping from the tank. 

As a result, the machine won’t be able to brew coffee without water.

Clean the filter and run a brewing cycle with clean water to fix it. 

If the machine can dispense the water smoothly, the pump will work and pump water. 

Use filtered water instead of tap water. 

The minerals in the tap water can create a buildup and block the filter frequently. 

Trapped air bubbles in the water lines

The air bubbles in the water lines can prevent the coffee machine from pumping water from the tank. 

To fix it, unplug the machine and gently tap it to release the air bubbles. 

The coffee maker needs descaling

Descaling the coffee maker involves using a descaling solution to remove the scale buildup. 

This happens when you use hard water. 

Its minerals deposit and eventually make your machine stop brewing. 

To avoid this problem further, use pure, filtered water. 

A bad or burnt taste 

Changing the coffee brand can bring changes to your taste. 

You have been familiarized with one brand for so long, and now you suddenly change it.

It is common to have a strange taste. 

But the problem occurs when the coffee tastes too bad and smells pungent vinegar. 

Common reasons could be not cleaning the machine too long or using tap water and low-quality K-cups. 

Here are some troubleshooting steps:

  • Regularly clean and descale the machine. For descaling, you can use vinegar and then wash the machine with fresh water to remove the vinegar smell. 
  • Coffee becomes 98% water with a vinegar smell when the water tank is not adequately rinsed after washing with vinegar. So, remember to rinse the reservoir with fresh water to remove the smell. 
  • Sometimes, the plastic parts can absorb the vinegar. For thorough cleaning, use warm water to remove the smell. 
  • Make sure that you use filtered water to prevent scale buildup. 
  • New coffee machines sometimes release a strange smell. I received a plastic smell when I bought the new machine at home. After some time, it vanishes. 
  • Use K-cups with fresh grounds or use high-quality K-cup brands. 

Keurig not heating 

It is one thing to prepare to make cold coffee and receive it correctly.

But for hot coffee lovers, it is irritating to get cold coffee instead of hot.

It means that your Keurig is not heating correctly. Problems might be:

  • The water pump is out of order.
  • The heating device is malfunctioning due to overheating when water is not pumped out. 
  • Coffee grounds or buildups are clogging the machine. 

With a malfunctioning water pump and heating device, you need a replacement. 

If there is any clogging, clean and descale the coffee maker. 

Remove the water reservoir, K-cup holder, funnel, drip tray, and tray cover. 

Clean these parts using a dishwasher or an all-purpose cleaner. 

Remove the clothes around the needles with paper clips. 

If you are not using the machine for too long, keep the reservoir empty.

After you attach the reservoir to the machine, add some vinegar and water in equal amounts. Use filtered water. 

Put a mug on the stand and run the brew cycle without placing the K-cup. 

Empty the mug each time after it is filled with water. 

Repeat until the reservoir empties the vinegar and water solution. 

Wash the machine thoroughly 3-4 times to remove the vinegar smell. 

You can follow the same process using a descaling solution instead of vinegar and water to descale the reservoir. 

Inconsistent Cup Sizes or Output

Putting the right amount of water and coffee grounds into the machine should give you the right amount of coffee. 

But when it gives you only a half cup of coffee or sometimes less than that, your machine has some problem with it. 

 It won’t mess up your countertop. But receiving less than half a cup of coffee when you need more is frustrating. 

Here are some things you can check:

  • One of the common reasons could be clogging. The base of the needles and the water line can trap dirt, debris, and coffee grounds. Clean the coffee machine’s entrance and exit needles, and then run a few water-only brew cycles. 
  • If the problem persists, descale the machine to remove the scale buildup caused by the water quality. 
  • Avoid using tap water, and prefer filtered water. 
  • Run a water-only brew cycle after each use, mainly after you use hot chocolate or a cocoa pod. 

Display and Indicator Malfunctions

Some Keurig models come with some lights and an LCD. 

It is alarming when you see that the lights on the display are blinking on their own. 

Some lights are blinking on the display

Based on the model, you can solve some of them. 

For example, if you have a Keurig classic, and the ADD WATER, HEAT, or MEDIUM CUP lights are flashing:

  1. Ensure the position of the cold reservoir is correct. 
  2. Run a 6 or 8 oz. water-only brew cycle into the measuring cup. If the water dispenses at the correct volume, it is okay. 
  3. If you use a water filter, run a water-only brew cycle, and if it works, remove the charcoal filter and use the water filter back in the brewer. 
  4. Perform three more 6 or 8 oz. water-only brew cycles. If the last brew dispenses the right volume of water, the problem is solved. 

Prime light blinking on the display 

Some models will have a PRIME indicator on the display. 

When the machine needs to PRIME, the lights on the display may blink. 

It happens to the Keurig Elite or Classic model. 

In this case, you need to clean the water reservoir and cleanse the brews:

  1. Remove the water reservoir and take it to the sink. If you have a water filter, remove it from the reservoir and keep it aside. 
  2. Throw away the water left in the reservoir and thoroughly clean the reservoir with soapy water. 
  3. Now, rinse with fresh or warm water and let it air dry. 
  4. Reinstall the water filter into the reservoir and reseat the water reservoir correctly into the coffee machine. 
  5. Refill the reservoir with clean water. 
  6. Turn on the machine, and run water-only brew cycles thrice with 6 or 8 oz. water. While doing this, put an empty mug onto the tray. 

All lights blinking on the display 

Now what if all the lights on the Keurig’s display are blinking or have turned on? Here’s what you need to do for troubleshooting:

  1. Please turn off the machine and unplug it from the outlet. 
  2. Leave it briefly, and plug it back into the outlet. 
  3. Press and hold the power button and turn it on with the lid open.
  4. Press the cup size buttons – small, medium, and large – several times. 
  5. Close the lid and repeat pressing the buttons again in the correct sequence. 

This will reset your machine. Temporary glitches are to be blamed in this process. 

ADD WATER indicator not flashing 

Suppose you have a K-Mini, K-Plus, or K-15, and you have recently descaled your coffee machine. 

In that case, chances are that the ADD WATER light will not flash even if the reservoir is empty. 

Simple troubleshooting steps for this glitch-like problem are:

  1. Ensure that your coffee machine has a proper power connection. 
  2. Raise the handle and release the water from the reservoir to the brewer. 
  3. If the light doesn’t flash, turn off the machine and keep a mug on the drip tray. 
  4. Hold the BREW button until all the water is in the mug. 

This should solve the problem. If not, reset your machine, or consult an expert. 

Addressing Leaks or Drips

With leakage, you will face two issues: leaking from the bottom and water leakage while heating. 

Leakage from the bottom 

The reason might be a damaged o-ring or water reservoir or overfilling the water reservoir. 

For a damaged o-ring, you need to replace it. 

It is present at the bottom of the water reservoir. 

Avoid overfilling the water reservoir. 

The excess water can fall into the drip tray and leak from the bottom when the filling exceeds the maximum water line. 

Ensure that water comes out of the reservoir. 

If you find water at the bottom, remove the reservoir, check for leftover water, empty it, and check for leakages. 

If you are done troubleshooting these issues, the last thing you can do is empty the internal hot water tank. Here are the steps:

  1. Place the mug on the drip tray. 
  2. Turn off the machine but keep it plugged into the outlet. 
  3. Lower the cold water reservoir lid and press the BREW button until all the water comes from the reservoir into the mug. 
  4. Wait for 3-5 seconds and let the water begin dispensing. 
  5. Wipe the moisture from under the machine and empty the drip tray. 
  6. Now pour 6-8 oz. of water into the reservoir again and perform a water-only brew cycle without the pod. 

Leakage while heating 

If water leaks while heating, common reasons could be an overfilled reservoir, a clogged machine, a broken upper gasket, or debris in the puncture needle. 

If the reservoir is overfilled, consider throwing away some water and always filling it only to the maximum line.

If the gasket seems loose, you can tighten it. 

But if it has broken, you need a replacement. 

Check the puncture needle and clean debris or grounds with a paperclip. 

Clean the reservoir, and descale your machine to remove the dirt and debris.

Follow the cleaning process from the “Dispensing System” point and descaling from “Keurig not Heating” point. 

Coffee grounds in the cup instead of liquid coffee 

Possible causes of this problem could be clogged exit needles and scale buildup. 

You need to unclog the needles and clean the scales from your machine. 

Other reasons could be incorrect pod size or pod failure, refilling the cup not using the correct ground size and improper positioning of the pod lid. 

Here are the troubleshooting steps for each problem:

  1. Remove and clean the exit needle, run a small-cup water-only brew, and watch the grounds coming out of the machine. 
  2. Repeat the process until the cycles are clear of the ground. 
  3. If this does not solve the problem, you need descaling, 
  4. If you use a reusable water filter, ensure using coarse coffee grounds. 
  5. Meanwhile, fill the basket at the bottom of the brown band. 
  6. Ensure the pod size is compatible, and the lid is correctly placed over the pod. 

Keurig stuck in the preheating mode 

If you have an old version of the Keurig coffee maker, like the 2.0 K400, it can sometimes get stuck in the preheating mode. 

To troubleshoot this, turn off the machine and unplug it. 

Plug it back after some time and switch on the power. 

If the problem persists, a loose wire might be inside the machine near the lid. 

This results from regular opening and shutting of the lid, thus leaving the wire detached from the microswitch. 

If the machine no longer has a warranty period, try removing the plastic cover and reaching the wires to reattach the loose white wire to the microswitch. 

Call an expert if you do not feel confident or have the warranty period left. 

Dispensing System problems 

You will hear a loud grinding noise when the Keurig coffee machine has a water-pumping problem. 

It indicates that the Keurig pump has failed to pump the water. 

Several reasons are responsible, but the common ones are scaling, dirt and debris, water pump interference, and needle clogging.

Some easy troubleshooting steps are:

  1. Take the reservoir out, empty it, and refill it again. 
  2. Shake the water around the reservoir, empty it entirely, and find the opening where the machine pumps the water into the brewer. 
  3. Clean the opening and ensure no dirt and debris are left. 
  4. Clean the needles as well with paper clips. 
  5. You can also remove the container, turn it upside down, and tap slightly to remove the dirt and debris. 

Another problem with the dispensing system is that the Keurig machine dispenses too much coffee. 

Too much coffee is too messy to handle. However, there are some tricks to fix it. 

First, clean the puncture needle with a paperclip. 

This should solve the problem. 

If that doesn’t resolve, try the Keurig burp:

  1. Unplug the coffee maker, and remove the water tank from it. 
  2. Take the machine to the sink or basin and turn it upside down. 
  3. Now, slightly tap the base on the machine several times. It will dislodge leftover or stuck dirt and debris. 
  4. Reassemble your coffee machine and run a water-only cycle. 

Now, your Keurig will brew the right amount of coffee.

Blocked water lines are also responsible. 

If you still face the same issue, your machine needs a thorough cleaning of all the parts, a descaling cycle, and running more water-only brew cycles to fix the issue finally. 

Using Compatible Pods

Keurig coffee makers will have pods. 

Pods are single-serving coffee filters that are enclosed with plastic.

Pods are inserted into the coffee maker, forcing hot water through them. 

Since all the machines do not have coffee pods, you must buy a compatible pod for your Keurig coffee maker if the previous one is broken or damaged. 

If you receive poor-quality coffee and sometimes plain water, incompatible pods are to be blamed. 

They do not fit well, deliver poor quality, and can also damage the machine over time.  

So, use the right pod type for your Keurig coffee maker. It should sit and fit well in the chamber. 

Error Messages and Alerts

Two common errors will be visible in your coffee maker’s display:

ADD MORE WATER error message 

This message is mainly shown when you do not put enough water in the reservoir for your coffee. 

But if the message is shown when you have given enough water, it is an error message. 

It happens when the machine has issues with the water reservoir. 

To troubleshoot the problem, remove the reservoir and clean it with soap. 

Rinse it well with fresh water again and put it back.  

PRIME error message 

This error message appears when the water does not come from the reservoir. 

Water not coming out can be the result of reasons like improper alignment or clogging. 

To troubleshoot the problem, you must first clean the dirty reservoir, put it back, and run the water-only brew cycle to check if it works. 

While removing and replacing the reservoir, ensure no air bubbles are inside, and everything is aligned correctly. 

After cleaning the reservoir, refill it and see if any of the above error messages are displayed. 

If it is, there must be some glitches. 

In that case, try resetting the coffee maker once. 

This should solve the problem. 

Brewer Reset and Rebooting issues 

At times, the Keurig coffee maker does not reset. 

Resetting is a process that most users love as it is a simple solution to most of the problems I have discussed in this article till now. 

The above reasons do have some specific reasons, but at times, some glitches are to be blamed, which get fixed by a reset. 

Resetting can restore the default functions and settings in the coffee maker and help you brew coffee again. 

Also, it improves the brewing process. 

But what will you do if the reset is not working? 

Troubleshooting the problem is easy. But you need to contact an expert if the malfunction continues.

Here are some reasons that do not allow the machine to reset:

  • The coffee maker is not put together correctly. The magnetic reservoir might not be adequately sealed. 
  • Air is trapped between the internal parts of the machine, causing malfunctions. 
  • Keurig’s internal system is malfunctioning. The computer or the device may have stopped working. 

To troubleshoot the problem, try the following solutions:

Solution 1:

  1. Please turn off your machine and keep it unplugged for some minutes.
  2. Plug back the machine again and turn it on. 
  3. Start a brew cycle. 

Solution 2: 

  1. Please turn off the machine and unplug it. Keep it like that for several minutes. 
  2. Remove the water reservoir. 
  3. After some time, plug in the back and turn on the machine. Put back the water reservoir and start a brewing cycle. 

Solution 3: 

  1. Open and close the K-cup holder. 
  2. It will reset the coffee machine when the brew cycle gets interrupted. 

Another reset you can try is Advanced Reset:

  1. Together, press the SMALL and MEDIUM cut buttons and release them at the same time.
  2. Press the MENU button 3 times immediately after this. The clock will read 6:09 when you do these steps correctly. 
  3. After 6:09, press the MENU button again. The display will show BREW 0:00. 
  4. Press the MEDIUM MUG button and then press and release the MENU while pressing the MEDIUM MUG button. 
  5. Now press the SMALL MUG button while holding the MEDIUM MUG button simultaneously. 
  6. Unplug the coffee maker several times, plug it back again, and start checking. 

Contacting Keurig Customer Support

After exhausting all the possible troubleshooting steps, if your Keurig coffee machine is not working correctly and you are having the same problem repeatedly, hiring customer care is the last resort. 

The professionals will thoroughly look at your machine, internally and externally, find the correct problem and fix it quickly without any mistakes. 

The best way to contact the customer support team of Keurig is to call them directly on their phone line. 

The hotline number is always available. 

You will be connected to a representative via live chat, where you will share the problems, and the expert will suggest you some troubleshooting steps. 

You can also submit a ticket on the Keurig website and explain your problems. 

After they get your ticket, a representative will contact you through email. 

There, you can explain the problems you are facing and also receive a solution. 

If needed, they will come to your house to fix the machine. 

Final Thoughts

Keurig coffee makers can face several issues, and knowing the troubleshooting steps is essential. Even if you have not faced any issues yet, learning them is good for the future. This troubleshooting guide can be helpful for you even when things seem dire. 

You can implement these tips and fix your machine’s problem. If all these tips fail, don’t worry. You still have the option of resetting the machine or consulting for help from the customer support team. 

Sometimes, resetting can solve whatever issues you are facing. But if the problem remains, you have to troubleshoot it with these tips I have shared or hire an expert for a solution. 

Why is my Keurig coffee machine making weird noises?

A Keurig coffee maker is already a noise machine. There will be strange sounds when it is brewing your coffee. But if you hear loud grinding noises, there might be some dispensing issues. Maybe it is struggling to pump water. 

Why is my Keurig coffee maker’s frother not working?

Frother is an excellent addition to the coffee maker. Common reasons behind the frother not working could be low-quality milk, the lid not closed properly, too much milk, or the incorrectly placed whisk. Check these things and fix them to solve the issue.

Reference: Keurig Coffee Maker