While dealing with electrical wires, you must learn them first. Color code is one of the easiest ways to learn which wires are positive and which are negative. However, the color code for the negative and positive wires will depend on the region.
There are 3 positive wires in the alternating current: black is the 1st, red 2nd, and blue 3rd. The white wire is negative, and the green is for grounding. In direct current, the red is positive, black is the negative wire, and white and gray wires are for grounding.
This is just a brief piece of information; there are more things to learn about electrical wires. Read this article till the end to gather detailed knowledge about the wire color codes and how to identify which are the positive and negative wires.

Check out our list of top-handpicked products for all your electrical, appliance, and HVAC system needs to keep your home running smoothly.
This post includes some affiliate links.Understanding the color coding: Overview of the common wire color standards
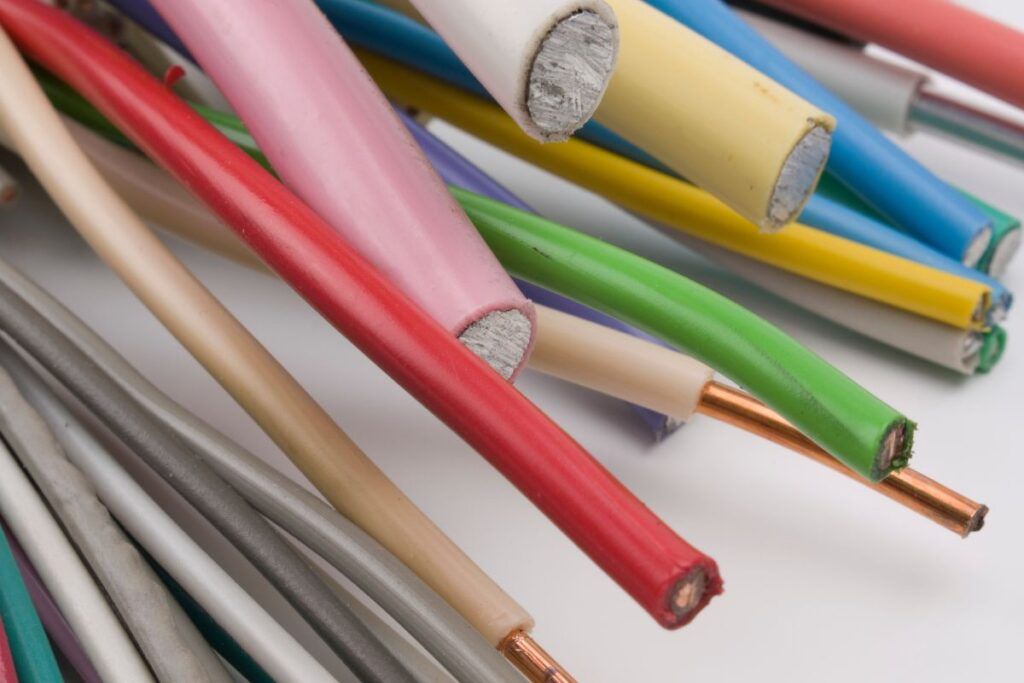
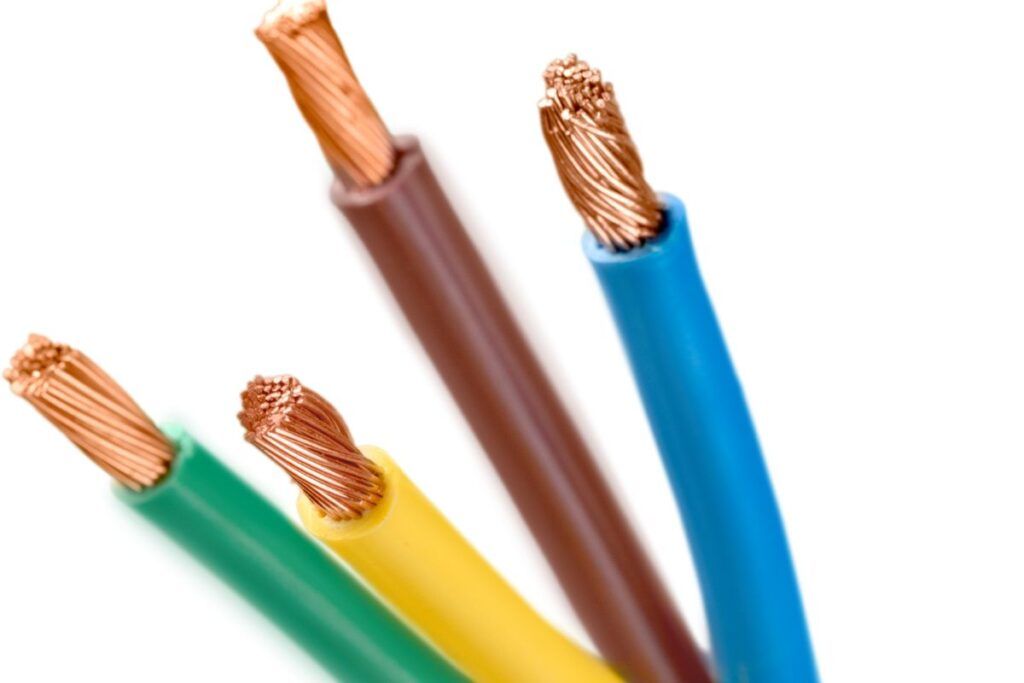
Color coding of the electrical wires offers a visual cue to the wire’s purpose and potential for danger.
Bare wires always look the same, but how do you know the purpose of each wire?
It depends on where YOU connect the wires and for what purpose you use them.
When I started learning about the wires, I was too confused to learn the roles of each wire.
But thankfully, the color coding has helped me understand the role of each wire and which one should be used in which place.
The National Electric Code, or NEC, guides about the conductor colors.
In this section, I would like to share an overview of the standard wire color coding information that I have gathered after going through the local codes and the NEC guidelines:
Black wires
The first on the list is the black wire.
This hot wire carries current from the primary power source or the house’s electrical panel to the lights, appliances, and other devices that run on electricity.
NEC does not produce any requirement that the hot wires always need to be black or any other color.
This color helps you to understand that it will be connected to the live terminal and used as the hot wire.
Black wires can also carry current from the light switch to the light. This section is called a switch leg.
The traveler wires that connect 2 or more switches to control one light can also be a black wire.
However, other colors are also used.
The black wire is a go-to wire for the hot connection in residential uses, and that’s why it is always assumed to be hot.
Red wires

Red wires are also used as hot wires but as a secondary.
The large appliances need 240V connections and two hot wires.
In such a condition, you will need a red wire with a black wire.
The red wires can switch legs, too, especially if you need 2 switch legs for one device.
One such example is the ceiling fan with a light.
You need two hot wires to control the light and the fan separately.
White and gray wires
White or gray wires are considered neutral or grounded conductors.
This wire is used as grounding or neutrals in the DC, but white or gray wires are used as neutrals in the AC.
They have separate wires for the grounding.
When the black or red wire carries current from the power source, the electricity must return to complete the circuit.
The neutral wire helps return the current to complete the circuit.
The process repeats in an endless loop.
The NEC recommends using white or gray wires or black marked with 3 white or gray stripes.
Other configurations are allowed for specific applications.
If you see a white or gray wire with black, red, or other color tape, it means that it has been used as the hot wire or some other connections, but not neutral.
In either case, the wire will carry current. So handle it with care.
Green, green-yellow, and bare wires
Bare wires, or wires with green or green-yellow insulation, are the ground wires.
These wires remain active only when there is any short circuit.
The excess current will require an alternate path to flow, and the ground wire provides that path.
Without the ground wire, the excess current will flow through your body whenever you touch the metal case of any appliance.
The wires mostly stay bare as they rarely carry any current like the hot or neutral wires.
But you will also see them with green or green with yellow stripes insulation for safety.
The insulation color or the bareness of the wire helps to understand which wire is used for the grounding.
I always prefer black or red wires for the hot connections, white for neutrals, and green for the grounding.
It gives me confidence that I am dealing with the correct wires.
Yellow or blue wires

These two wires are sometimes used for traveler wires for 3-way and 4-way switches.
These are also used as the switch legs, especially when the house’s electrical wires go through the pipes in the wall, attic, or basement.
Sometimes, the residential electrician uses cables with black or red insulation as traveler wires or switch legs.
These cables are connected directly to the studs without any protective pipe.
You will also find the blue and yellow wires as positive wires in the commercial and industrial buildings that use three-phase power.
Brown, orange, pink, and violet wires
In the 240V, you will need two hot wires for the larger appliances.
In such conditions, you use the orange/red as the secondary positive wire; black is the primary.
The orange wires are used in the fire alarm circuits.
Pink and violet wires are for the traveler wires, switch legs, and dimming control wires in the lights.
The brown conductors are mainly used as hot wires in the 3-phase high voltage circuits in AC power.
Universal color coding: Consistent wire color standards for the positive and negative wires
If you need to identify the positive and negative wires, two color codes indicate positive and negative wires.
The black and white wires are the two common types of wires used for all purposes, and they have remained constant.
The black wire is considered the hot wire.
The wire carries the current from the primary power source.
Another wire is the neutral wire which is colored white and plays the role of a negative polarity.
Sometimes, the wire will be gray, but mostly, it stays white.
The neutral wire returns the current to the main circuit panel and completes the circuit.
Though the white wire is negative, you must be careful as it can still conduct electricity while carrying it back to the primary power source to complete the circuit.
Another wire that is commonly seen is a bare copper or green wire.
This wire is used for the grounding, which carries current when there is a short circuit.
These three wire colors stay consistent all the time.
The other colored wires have different functions in AC and DC currents and other appliances.
Polarity in the direct current (DC) wiring: Identifying the positive and negative wires
Except for the black hot wires, the other wire colors never remain the same in the alternating or direct current.
The direct current, or DC, runs in a straight line.
It can deliver a consistent form of voltage and cannot travel the exact distances as the alternating current.
DC power is primarily used in batteries, flashlights, mobile phones, solar cells, and fuel cells.
It can also be made from the AC with a rectifier.
You will find 2-3 insulated wires when you wire the DC power.
- The red wire is the positive wire.
- The black wire is the negative wire.
- The ground wire will be either white or gray.
Sometimes, a gray wire is used instead of a white wire for grounding.
The white or gray ground wire is also called a neutral wire in the DC wire setup because the DC does not have separate ground or neutral.
Sometimes, there won’t be any red wires if you have two black wires.
Out of two black wires, one will have white strips.
The solid black wire is the hot or positive wire, and the black with white strips will be the negative wire.
If the color code becomes confusing for you to understand, look at the following labels in the wires to identify the positive and negative wires:
2-wire ungrounded DC power system:
- Wire with L+ is the positive wire.
- Wire with L- is the negative wire.
2-wire grounded DC power system:
- The L+ marking on the red wire is the positive circuit wire of the positive grounded DC system.
- The N marking on the white wire is the negative circuit wire of the negative grounded DC system.
- The white wire with the N marking in the positive grounded DC power system is positive. If you confuse it with the previous one, consider checking with the multimeter.
- The negative wire in the positive grounded DC system is marked with L- and colored in black.
3-wire grounded DC power system:
- The red wire with an L+ marking is the positive wire.
- The neutral wire is the white mid-wire at the center tap with an N marking.
- The black wire with the L- marking is the negative wire.
- Consult your electrician before you confirm the wire polarities.
Alternating current (AC) wiring: Polarity considerations in the AC system

Alternating current or AC is mainly found in the power outlets installed in standard US houses and businesses.
AC power is unique because the flow of the charge can periodically change its direction.
The AC power moves in a sinusoidal AC wave.
This motion makes the AC power move further than the DC can travel.
This is an advantage of ferrying power to the buyers from one location.
AC power has different types based on the number of voltages the wires can carry.
It is essential to know that there will be multiple phases in place in this wired setup.
Each phase will have its own wire color to understand which wire has what role to play.
For the single phase, follow the following color code to understand the positive and negative wires:
- The black or red wire will be the positive wire. The black will be the primary hot wire, and the red (in case) will be the second active hot wire. Find the L marking on the wire.
- The white wire marked with the letter N is the neutral wire, which is the negative wire.
- The ground wire will be bare copper or have green or green with yellow stripes insulation. Check for the letters PG (protective ground).
If you have wires with 120V, 208V, or 240V, you will see the following wire colors for 3-phase:
- The phase 1 positive wire with the L1 label will be black.
- The phase 2 positive wire with the L2 label will be red.
- The phase 3 positive wire with L3 marking will be blue.
- The neutral wire is the negative wire and is white.
- The ground wire is solid green or green with yellow stripes.
In some circumstances, phase one will have a higher voltage than the others.
These are called high-leg connections.
You can recognize it by looking at the orange wire; it is a high-voltage wire.
High-voltage connections are standard in lots of manufacturing and industrial areas.
Identifying the wires with the correct color codes is essential to avoid severe electrocution and other potential hazards.
Here is a color code guide for the high voltage (480V) wires 3-phase:
- The phase 1 positive wire will be brown.
- Phase 2 positive wire will be orange.
- Phase 3 positive wire will be the yellow wire.
- The neutral wire will be gray.
- The ground wire will be green or green with yellow stripes.
- These are the wire color coding for the alternating current or AC in the US.
Grounding and Safety: Exploring the green and yellow/green wires
The ground wire’s purpose is to protect from electrocution.
An excess current flows when an exposed hot wire comes in contact with the metal part of any appliance and causes a short circuit.
The ground wire provides an alternate path for the excess current to flow.
The current will flow through your body without grounding whenever you touch the appliance.
The earth under our feet contains a negative electrical charge.
So, it is common for the positive electrical charge to get attracted to it naturally.
The ground wire helps the positive electrical charges reach the ground safely and directly in a controlled manner to get discharged without causing any electrical shocks and accidents.
Since the wire carries current only when there is a short circuit, the wire is mainly kept bare.
But sometimes, you will see it insulated, and the color code for this wire is always solid green or green with yellow stripes.
In DC power, you will see the white or gray wires used as a grounding because DC power does not require separate grounding.
But the AC power always contains a separate grounding.
The wire will either be bare, or the insulation will be green or green with yellow stripes.
Special appliances: Understanding the significance of the red, blue, and other wire colors
Appliances do not have positive or negative wires.
Instead, the color code helps identify the hot, neutral, ground, and traveler wires.
Some larger appliances, like air conditioners, require higher voltages, like 240V, and will have two hot wires: black and red.
The black wire will be the primary hot wire, and the red wire will be the secondary active wire.
If you have a speaker, you will find copper and silver wires.
The copper-stranded wire is the positive wire, and the silver-stranded wire is the negative wire.
The clear casing sometimes holds these wires together.
You can also see through that or observe the exposed wire at the ends.
The power cords have hot, neutral wires instead of positive and negative ones.
You do not need to inspect and recognize these wires by color codes.
The longer prong is the neutral connection for the modern 2-strand appliance cords with 2-prong plugs.
If you check for the wires, you can identify the neutral wire by the white stripes, rubbing, or the white insulation.
Look for solid black or red insulated wires for the hot wires.
If the cord has a ground wire, you will also see a green wire, which is rare.
In the extension cords, the ribbed wire is usually the negative wire.
But if you have two wires of the same color, the strand with a grooved texture is the negative wire.
The smooth wire is the positive wire.
In some cases, the blue wire is used as a hot wire found in a conduit for a plug-in electrical appliance.
The blue and yellow wires are usually used as traveler wires or switch legs for 3-way or 4-way switches of any appliance, lights, and fans.
You will also need two hot wires for a ceiling with an attached light if you wish to run them separately.
Testing wire polarity: Techniques to determine the positive and negative connections

One method to understand which wires are positive and negative is by learning the color coding of the wires.
The colors I have shared above are what I have seen and witnessed throughout my DIY electrical journey.
The colors can vary based on where you live and what your local codes say about it.
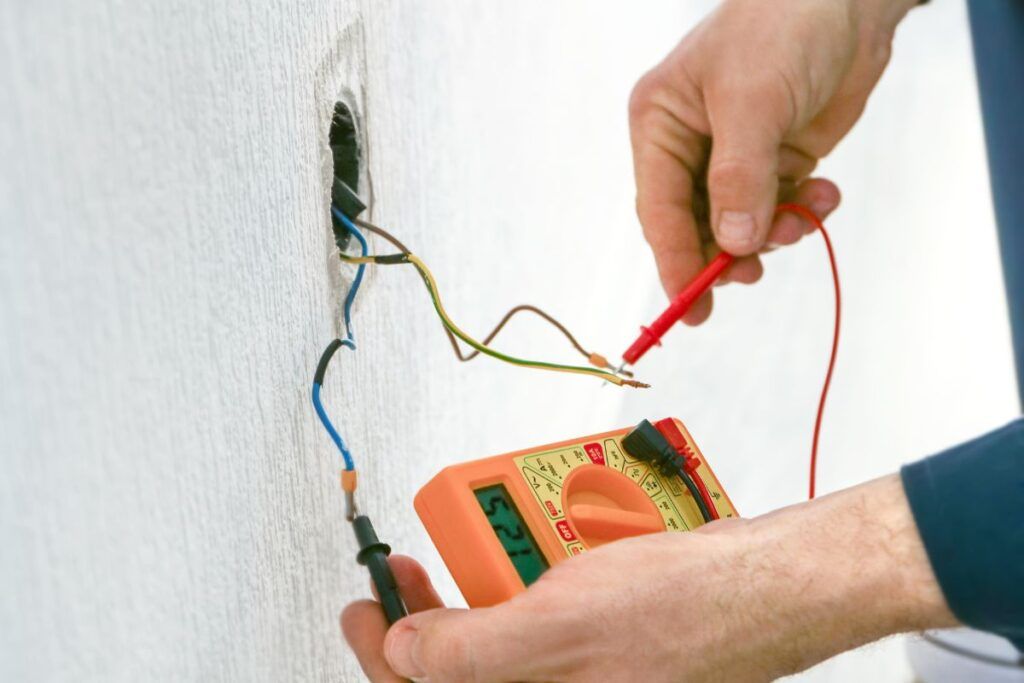
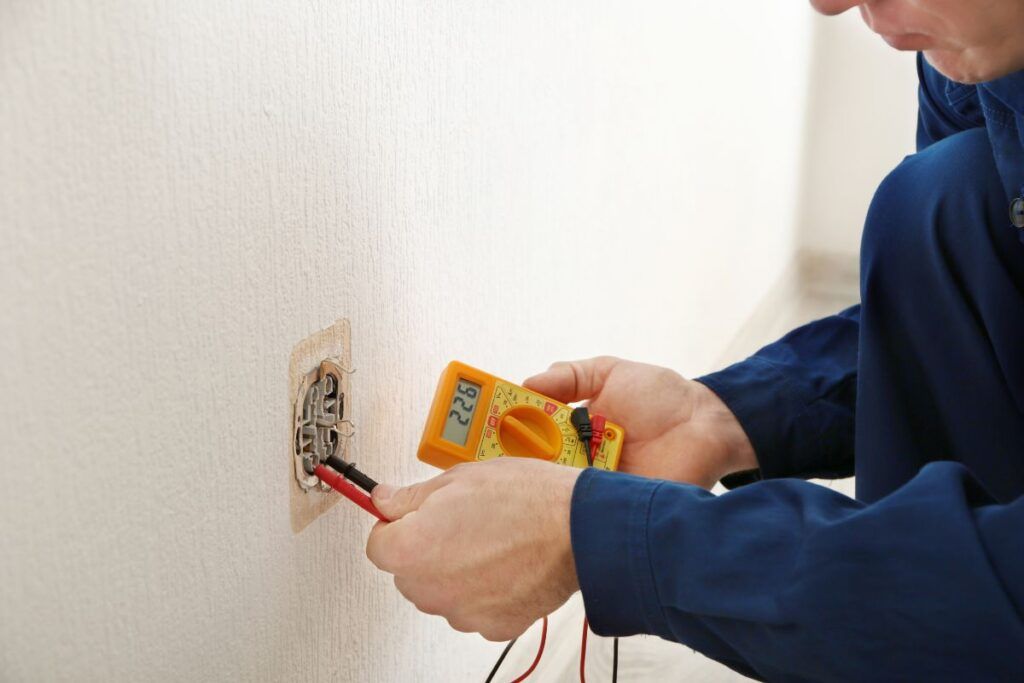
In that case, another way to check out the wire polarity and determine the positive and negative wires is by using a multimeter or non-contact voltage tester.
When you use a digital multimeter to test the wire polarities, the analog multimeters get easily damaged when the probe’s connection is wrong.
First, prepare the multimeter for testing:
- Set the multimeter to the current voltage.
- Rotate the selection dial knob and point to the part with a V next to it.
- Connect the black probe to the port with the COM label.
- Plug the red probe into the port mentioned in V.
- Pin the probes together to regulate the multimeter. The device should beep if it is okay.
Here are the steps to identify the positive and negative wires:
- Connect one probe’s lead to one wire and the other probe to the other end of another wire. You can use an alligator clip on the leads.
- Check the multimeter voltage reading.
- If the value is positive, the wire attached to the red probe lead is the positive wire. You will receive a reading of 9.2V.
- So, the wire connected to the black probe should be the negative wire.
- If the reading shows negative, your wires are connected in reverse. The wire on the red lead not showing any reading is the negative wire, and the one connected to the black lead is the positive wire. Swap the wires to confirm it.
- If the negative voltage value remains, your multimeter is faulty.
Make sure to turn off the power while checking the wires.
The hot wire always has a current even if the power remains off.
So, do not worry about the readings.
Here are some ideal multimeters:
- KAIWEETS Digital Multimeter TRMS 6000 Counts Voltmeter Auto-Ranging Fast Accurately Measures Voltage Current Amp Resistance Diodes Continuity Duty-Cycle Capacitance Temperature for Automotive.
- Klein Tools MM400 Multimeter, Digital Auto Ranging, AC/DC Voltage, Current, Capacitance, Frequency, Duty-Cycle, Diode, Continuity, Temp 600V.
- Crenova MS8233D Auto-Ranging Digital Multimeter Voltmeter Ohm Volt Amp Tester with Backlight LCD Display Test Leads.
- INNOVA 3320 Auto-Ranging Digital Multimeter, Red & Black.
With a non-contact voltage tester, you do not need to touch the wires and connect them to any probe.
Take the tester and place its tip on the wire.
The device beeps when it reaches the tip of the hot wire.
Some testers will have indicators. If a light lights up, the wire is hot.
Mistakes to avoid: Common misconceptions and errors in the wire polarity identification
As a beginner, you are prone to making mistakes while identifying the positive and negative wires. But practice makes a person better.
I made some errors in the beginning because of misunderstandings about the wires.
To avoid these mistakes, I recommend that you take note of the following things:
- The black and red wires are not always considered positive wires. The local code in your region or the manufacturer might use a different wire. Do not rely on a particular color code. Even the blue wire is sometimes used as the hot wire.
- Just because the wires’ color codes match your region’s code doesn’t mean you can deal with them without testing. You should still check and confirm the wires with a non-contact voltage tester or a multimeter.
- Beginners often ignore the markings and labels on the wires. Some wires will have ‘+’ or ‘-‘ signs mentioned for positive and negative wires. There are other markings, too, for example, PE (protective earth), N (neutral), L (hot or live), etc. Look for these labels in the wires.
- Do not identify the wires by the wire position in the connectors. There is a 50-50 chance of the wire positive being correct and wrong. So, consult the connector pinout or documentation to learn about the positive and negative wires.
- Some electrical systems and appliances will have numerous voltage levels with specific polarity needs. Do not forget to identify and understand the voltage levels before deciding on the wire polarity.
- Even if you are a pro in electrical work, you should never neglect personal safety. I have seen a lot of experts doing work without proper protection. I would never recommend doing it. Always wear insulated gloves, proper boots, goggles, and PPE suits if needed when working with severe electrical work. Avoid working around wet areas, and do not use metal ladders.
Here are some safety PPE gears to stay safe while doing DIY electrical projects:
- Klein Tools 40215 Journeyman Grip Gloves, Large.
- Klein Tools 60163 Safety Glasses, Professional PPE Protective Eyewear with Full Frame, Scratch Resistant and Anti-Fog, Clear Lens.
Professional assistance: Seeking guidance from electricians and wiring experts
Seeking professional guidance is always a wise decision.
Since they have worked with such stuff for a long time and most have training and certification, they can tell you the correct wire polarity.
Electricians are skilled with wiring polarities, diagrams, and schematics.
Consulting them will be a great choice if you have complex wiring and need guidance about the wire polarities.
You can participate in online forums and communities related to electrical works to gather knowledge from professionals and experienced DIY fanatics.
While learning from online sites, you must exercise caution and verify the information you receive, as only some sources might be reliable.
I have done a lot of DIY projects from online DIY enthusiasts and forums.
Though most were reliable, some were not because of the codes and living region.
Some information was reliable for their living region, but not for my locality.
So, before approaching, I had to confirm them with the local experts and my region’s codes and regulations.
Final thoughts
Multiple colors of wires are available, each with individual roles to play. You need to learn the wire polarity through the colors. However, do not believe in any one color as the positive wire. The same wire color can be used as a negative wire somewhere else. Look for the markings instead, like PE/PG, N, L-, L+, L1, L2, L3, and so on. You will find the correct wire with these markings.
For example, PE indicates a ground wire, N is for neutral, L- is a negative live wire, and L+ is for the positive live wire. It will help you understand the wire polarity. If you are still unsure, use a multimeter to check the polarity.
Connect one wire to the red probe lead and another to the black probe lead. The positive wire will show readings in the red probe. Finally, do not hesitate to consult your electrician to confirm the correct polarity.
What do I do if both wires are of the same color?
If both wires are the same color, there will be a difference. For example, if you have both black wires, one black wire will have white stripes. Otherwise, use a multimeter to determine the polarity.
Do the white wires have a current?
The white wire is the neutral wire that returns the current to the primary power source to complete the circuit. So yes, the white wire will carry current.
Reference: Electrical Wires Wikipedia

